Today on the Internet you can find a lot of different information about how, Of course, the approach to work for each artist may differ from each other. And every way of drawing will be correct!
Nevertheless, I also decided to make my tiny contribution to the “web web”, as I work with this type of paint, along with traditional oil and stained glass lacquer paints. You can see my paintings in different execution techniques in
The whole complexity of writing with acrylic paints lies precisely in the details. The general principles for applying these paints and their combinations differ little from oil. But nevertheless, mixing, applying them to the surface, as well as transparent glazing are somewhat specific. Previously, I wrote in painting.
For those who are just looking at acrylic and trying to draw for the first time, it is useful to take the first steps according to a well-established technique. That's why this article came up: I will tell you in it how to paint with acrylic paints so as to take into account their main features. This is of course not an absolute rule, since any painting is a whole living world and accordingly, improvisation in art is only welcome.
Two acrylic sketches
In the photo, I choose one of the acrylic sketches for further work on oil on canvas.
In the art of music, most likely there would be no jazz if it were not for the virtuoso musical improvisation of the musicians. By the way, did you know that many musicians have shown talent in the visual arts as well? Take an interest and see for yourself the talent
In the future, if you decide to continue working with them, you will already be able to experiment with certain subtleties, improvising and creating your own music on canvas! So let's go...
Getting started: preparing a palette, brushes and paints
You can paint with acrylic paints on cardboard, on thick paper designed for acrylic, but it’s better, of course, a suitable canvas is suitable for acrylic painting. Therefore, painting with acrylic paints on canvas will be the right decision!
If you're not ready to paint on canvas right now, start simple with acrylic paper, with canvas structure. You can later stick such work on thick cardboard, hardboard or canvas. And as they say, framed and on the wall!

Accessories before you start painting with acrylics
Already at the stage of preparation for work, it is necessary to take into account the main features of acrylic paints.
First feature: they dry very quickly, both on the palette and on the canvas. Therefore, to prepare paints, you must either use a special palette, or constantly keep them in a liquid state on the floor. If you decide to apply masks pasty or with a palette knife, then this feature will only help you.
How long does acrylic paint dry?
Everything directly depends on the thickness of the stroke, the thinner it is, the faster the acrylic dries! If in acrylic painting the drying speed confuses you, and you do not dare to try them in your work because of this, then do not worry. Today on the Art space appeared special means - drying retarders.

Retarders for acrylic painting
They dilute acrylic paint and it will not dry for hours on the palette, remaining in the right consistency. On canvas it also dries with a noticeable slowdown.
Second feature: acrylic paints after drying slightly darken, fade by about a ton or two. Therefore, initially we select them so that in the working form they are a tone or two lighter than we need in the picture. This is especially important if you are finishing where a smear has already been placed. That is, one stroke over dry paint will be visible ... try it and you will understand for yourself.

Sketch with acrylic paints
The photo above shows an example of a previously made sketch with acrylic paints. This sketch was prepared before the main work - painting on the wall. The drawing must be clear and correctly written. Therefore, the image on the wall must match the sketch, as there will be an exact repetition, only on a larger scale.
Pay attention to the transition from light to dark in the arch opening .... This effect can be achieved by glazing, as if transparently overlapping with one paint from above.
The picturesque colorful layer is the main thing in painting, so we start work with the choice of colors and shades of your future composition. As a rule, novice artists simply take the colors of paints that they have in the kit, that is, in tubes. And if you need colors that are not in the tube? Here the ability to mix colors comes to the rescue, to get a new shade. After all, it is by mixing that we get new interesting color variations!

The richness of shades is obtained by mixing
Glazing with acrylic paints- a separate issue. If you are just learning acrylic, then paint with independent, dense tones, just get used to the colors and their features. Once you've mastered the basics, you'll be able to play around with creating translucent blister layers.
Below in the photo from left to right: the usual method of applying paint, the second option is the postose technique, the third is a light watercolor-lisser technique.

Examples of paintings in different acrylic techniques
Important feature: with each stroke, try to form those contours that you want to see in the final version. Acrylic paints dry in just a few minutes and it may turn out that when you want to finalize the contour, it will already dry and fade, and the new layer on top will contrast with it and prevent you from correctly evaluating the intermediate version.
It is desirable, of course, to immediately outline the contours of objects with contrasting edges. This will make it easier to draw each individual one.
Another caveat: the brush needs to be washed frequently, especially when drawing very fine details. For example, animal hair, grass, small stones require very thin brush strokes. If a large amount of paint sticks to the brush and it dries out, then the hairs stick together and the strokes become thicker and rougher. They fail to create the desired structure.
In one day or evening, it is desirable to complete one complete independent element, at least one of its layers. Then, after drying the next day, you can start with a new element and not puzzle over whether the part completed today will contrast with the one you wrote yesterday.

Painting with acrylics on canvas
On a note
Remember that acrylic paints are practically not washed off clothes. Therefore, it is advisable to write with them in a durable apron or work robe.
This may be your first acrylic painting and it doesn't have to be perfect. Its task is to let you understand how to work with acrylic correctly, how it lays down on canvas or paper, how long it takes to dry, and what result you get when applying it.
When you write it, you will already understand what caused certain shortcomings, and in the next works you will be able to avoid these mistakes. That's why feel free to write, evaluate the result, draw conclusions and improve. Perhaps it is acrylic that will help you to fully reveal your creative potential!
For those who want to improve and want to go further, I offer a complete video course, a guide on the example of a painting in a modern style. Video is the most convenient way to learn, in my opinion. Lesson announcement 📌
Friends, so that the article does not get lost among the many similar ones, save it to your bookmarks. It will always be at your fingertips at the right time.
Ask your questions below in the comments, I usually answer all questions quickly
Drawing classes help to relax, calm down and get away from everyday, domestic problems into the world of dreams and fantasies. You can start drawing with anything: pencils, gouache, charcoal, oil paints, watercolors. But only a box of watercolors familiar from childhood can give a ticket to childhood, a world of fantasy and adventure. What can be painted with watercolors?
Where to begin
With ease, they will help you create a variety of images, landscapes, still lifes, everything your heart desires.
To begin with, it is worth arming yourself with desire, patience, various brushes, paints, a palette and water containers. Sometimes it is useful to have sponges, paper napkins, and also simple pencils and sponges on hand. So what can you paint with watercolors? How to make drawings of the highest quality and professionalism?
Watercolor paints - to fight
Both experienced artists and beginners, including the smallest ones, love to paint with watercolors. It contains natural, harmless pigments. The adhesives in these paints are also created by nature. Used mainly such as gum arabic, casein, honey, dextrin, phenol. The brush is wetted with clean water, then paint is picked up, then conceived images begin to appear on the surface of the paper.
What can be painted with watercolors? Due to the transparency of the pigments, they are able to convey weightlessness, lightness, freshness. So, for example, to draw something light, weightless with oil paints, you have to apply several opaque shades one on top of the other until the desired effect is obtained. Watercolor is a universal medium, because thanks to the unique structure of paints, it becomes possible to reproduce all genres, original and unpredictable effects. Pigments on paper seem to melt, spread, their mixtures can create various combinations of colors and shades. What can you paint with watercolor for beginners? Whatever the soul of the artist desires.
The question arises: what about gouache? How are they different from gouache? Transparency is what distinguishes watercolor from gouache, where pigments are mixed with white.
There are many interesting ways to paint with this paint. The main ones are described below.
Flat brush painting
What can be beautifully painted with watercolors? Let's figure it out. Anything can be beautifully painted with watercolors. But there are also unusual ways to do it. There is an interesting method of painting, performed with a flat brush, designed for paints on a wide variety of bases, both water-based and oil-based, acrylic. Its principle is as follows: two different colors of paint are drawn on the edges of a flat brush.

Work is done on a dry sheet of paper. First - a square or triangle outline is drawn to determine the beginning and end of the layer. Next, colors are selected, and a line is drawn along the upper left corner to the right corner (left-handers start drawing from right to left). With this technique you can get masterpieces! So, plants are often drawn:
- flowers;
- petals;
- floral ornaments;
- snow-covered firs.
Differentiated (in certain areas of the picture) blur
This method is the main one among professional artists. It is done as follows:

What can be painted with watercolor in this way? This method is used by artists to depict the sky, large meadows, glades, water, various surfaces where transparency, lightness and immensity are required. It becomes possible to convey in the picture all the shades of natural beauty, natural overflows. Differential blur helps show the richness and magic of natural beauty.
Glazing
What can be painted with watercolors in stages? A method resembling blur, but in this case, the pigment should be applied to a dry sheet of paper. Glazing allows you to adjust the color and tone of the picture, clearly work out the transitions of shades. When working with glazing, each color should be dried separately in stages. This is how the background of the drawing is created, if the artist wishes, the sky, the sea, any extensive surfaces are drawn.
"Wet on wet"
What can be easily painted with watercolors? There is a method developed by European artists that allows you to paint landscapes and natural phenomena in a wonderful way. The secret of the method lies in the fact that the paint is applied to a wet sheet. The entire canvas is evenly wetted with clean water. It is most convenient to do this with a sponge, but a large soft brush will do. Further, the necessary strokes are applied with a brush, creating unique shapes, shades, color transitions in the work.
"Dry brush"
This method requires certain skills and skill of the artist. An almost dry hard brush is used here. Paper - should also remain dry. A large amount of paint is collected on the brush and the study of images begins. On bumpy surfaces, it is possible to create clear marked marks, create effects similar to pencil drawings.

In this way, both independent works are created, and individual elements that are lost in a dull background are worked out. What drawings can be painted with watercolor "dry brush"? Very often this method is used to create portraits, landscapes, still lifes. In a word - wherever detailed elaboration of images is required. A “dry brush” is able to bring clarity, clarity to a drawing, like a pencil - to show the necessary lines and curves, one might say - to write a whole work about what the artist painted.
flushing
What can be painted with watercolor paints? There is another unusual way of using watercolors used by professional artists. In this case, the pigment needs to be washed off after it has completely dried. The part of the work that needs correction is wetted with water. Next, blot this area with a soft absorbent cloth. Excess paint, along with water, will remain on the fabric. This technique creates unusual shapes, curves, lines, gives volume to figures, color depth.
Drawing with water on paint
A layer of watercolor is applied to a sheet of paper. When the paint dries, take a clean brush, wet it with water and drip drops of water on the desired areas. This allows you to create layering, volume, the illusion of cracking rounded shapes.

Glaze
Watercolor paints of light tones are applied one on top of the other in a certain order: lighter shades are lower, darker ones are higher. The pigment is transferred to a sheet of paper with the thinnest brush strokes only after the previous layer has dried.

As a result, volumetric figures will appear, in which all colors will complement each other without mixing, allowing you to see the boundaries of multi-layer paint application.
scratching
A method that allows you to remove individual areas of paint on a dry surface. In some cases, in this way, within the same tone, its enlightenment is made.
Disguise
What can be painted with watercolors easily for kids? In principle - anything, but in this method - there is an element of mystery and mystery that can attract the attention of any child. On a sheet of paper, before applying a layer of watercolor, with the help of wax or paraffin, areas that should remain unpainted are closed. Next - work is done with paints. As soon as all the paint dries, the wax can be rolled up with your hands, with a brush, or left on the canvas.

Addendum
A different color is added to the wet areas of the future work, which in a unique way creates illusions, bizarre overflows. Using this method, you can create different color solutions that are not possible with the usual mixing of paints on a palette.
A little history of watercolor painting
Even primitive people discovered and began to use watercolor natural pigments. They mixed them with water, applied them to the rocks with their fingers, as well as simple tools (sticks, bones).
In ancient Egypt, water-soluble dyes were used to create amazing, original paintings on the walls of the palaces of the pharaohs, tombs, religious buildings; during excavations, intricate watercolor drawings depicted on papyrus were found.
Watercolor paints were known to masters from Japan and China.

The works were done on silk, as well as on handmade rice paper. The artists of the Far East painted contemplative landscapes in the tradition of their schools, filling the images with literary allusions and calligraphy.

In the 18th and 19th centuries, a classical technique was developed in England, which absorbed all the most important, interesting things, which made it possible to achieve amazing results with the help of watercolors. Watercolor pigments were used in the wash technique, allowing light reflections from the paper surface to be transferred to the canvas.

For centuries, artists have been preparing water-soluble paints for themselves, keeping unique recipes in secret. In watercolor painting, the surface on which the artist works also plays an important role. The texture of the canvas is also an obvious and important factor in the work of true professionals. The texture of the surface of the paper changes under layers of paint, the slippery smoothness of pastels, under the overlay of collages. All these changes need to be felt, caught as if they are a continuation of the artist himself, and directed in the right direction.
10 simple magic techniques for children's creativity
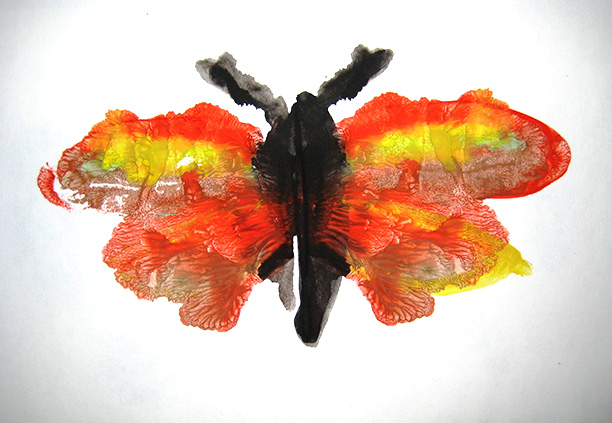
1. Monotype
Essence: ink imprint on paper with a smooth surface. What do you need: a piece of glass or tile, paper, watercolor, soft brushes, water. Process: we wet the glass, apply paint spots on it, put a sheet on top, carefully turn it over and remove the glass. What happens: very picturesque stains that give room for the imagination: “Look, mom, these are clouds! And here is the forest… And here are the waves!”Of course, God himself ordered to supplement what he saw among the spots with details. Using this technique, you can make a background, and draw a graphic image on it with a thin gel pen - when it dries.

You can create targeted prints, including symmetrical ones: paint is applied to one half of the sheet, then we fold it - and we get the second half of the picture!
You can “print” with paint from different forms - for example, from leaves or templates cut out of cardboard. Then it is better to take thicker paints - gouache or acrylic.

Or pre-impose cut out simple stencils on the sheet - then the background will turn out to be colorful, and the images will be white.

2. Blotography
Essence: from a colorful blot, you can “inflate” the original figures. What do you need: thick paper, thick brush, gouache, drinking straws. What happens: we drip onto the sheet with paint, then through the straw we blow on it, making lines. Then, depending on what we see, we supplement the image with a pattern or appliqué.
In this technique, it is especially cool to draw trees - the branches turn out to be very naturally curved.

3. Fun dots
Essence: for professional artists, this is a separate style, called “pointillism”. What do you need: paper, gouache, palette, cotton buds. What happens: we apply paint of different colors on the palette, dip the sticks - and tightly cover the space with colored dots. For convenience, we first make a light pencil sketch.
You can also draw with dots with the help of brushes, but, unlike sticks, you will need not to be lazy to wash them. Another cool dot is the outlines for the fabric, but they should be worked carefully so as not to extrude too much and not make puddles.
4. Spray
Essence: what kids love is splashing. And doing it with paint is much more fun, and even with meaning! What do you need: paper, liquid paint, stencils (silhouettes cut out of cardboard), old toothbrushes. What happens: we put our stencils on the leaf - and with the help of a brush we “spray” the paint over the surface, then we remove the cardboard and see the pictures. You can apply several layers - both contour images and paints.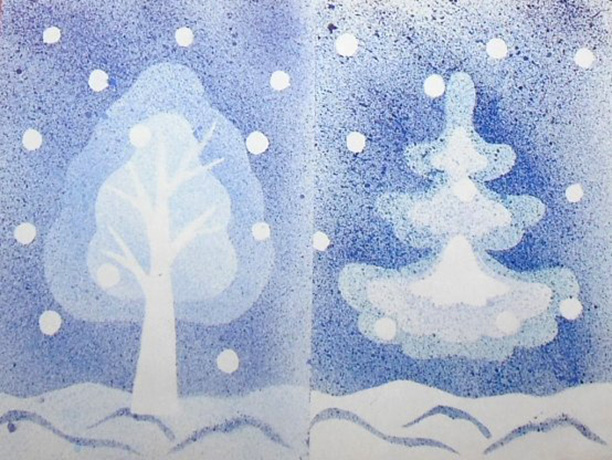
5. Scratches
Essence: this technique has an elegant French name "grattage". What do you need: wax pencils, gouache, paper, liquid soap, a candle and a thin stick (for example, a knitting needle or a used rod). What happens: we color the sheet with pencils, then we rub it with a candle, and on top we cover it with a layer of dark gouache mixed with soap (so that it lays evenly). When the paint dries a little, we scratch the drawing on it. It turns out very unusual and mysterious, especially night and space scenes.
6. Candle art
Essence: the drawing magically appears - white lines on a colored background. What do you need: paper, a candle, watercolors and a wide brush. What happens: we draw on paper the contours of some objects or creatures with a candle, like a felt-tip pen. Then we cover the sheet with watercolor. Since the paint flows off the paraffin or wax, the outlines drawn by them remain white or dotted.
7. Paper mosaic
Essence: ancient artists decorated temples and palaces in this way, and we can do the same at home. What do you need: a sheet of thick paper, glue stick, colored paper, scissors. What happens: We cut colored paper into stripes, and then into small squares. We make the outline of the drawing with a simple pencil, carefully cover the sheet with glue and sculpt a mosaic on it. It turns out beautifully when the slightly protruding background is dark.
8. Both drawing and appliqué
Essence: a great idea for a joint family project: mom draws evenly, the child paints and glues with pleasure. What do you need: base sheet, detail paper, paints or felt-tip pens, carbon paper (you can make it yourself by thickly painting the paper with a soft pencil or charcoal), scissors and glue. What happens: the senior artist draws on the basis of a general drawing “in a conditional style”, and on another sheet we transfer its individual details - simple and geometric, like circles and semicircles. The child paints the details with the right colors, cuts and glues on the template, assembling a puzzle picture.Looking at the paintings of famous artists, you involuntarily admire their creativity, the ability to depict the world around us in bright colors. Each of us can also try to master the art of drawing and make this hobby our favorite pastime. Here are beautiful gouache drawings for beginners, they will allow you to test your talent in painting and master the technique of drawing with paints.
To master the gouache painting technique for beginners, you must have for work:
- A set of gouache paints of twelve colors.

- Paper.

- A pair of flat hog bristle brushes.

- Palette and dishes with water.

The aroma of gouache paints is familiar to everyone since childhood. How to draw with gouache is not difficult to understand, the technique of such drawing is quite simple. It is necessary to draw, starting with a sketch of a drawing with a pencil.
A palette knife is used to apply paint and mix it. With it, you can apply paint with even strokes.

From an early age, we draw in gouache in the album a simple, unpretentious landscape. But, you can draw patterns, flowers, mountains, and even city buildings with such paints. For beginners, working with gouache is just an ideal option.
Drawing a sketch with a pencil, you can avoid mistakes and do the job neatly. If you smear and mix paints directly on the canvas, you will get just dirt in the picture. Therefore, you can add a little water to gouache and it will turn into watercolor.
To learn how to learn how to draw beautifully with gouache, you need to get acquainted with the step-by-step technique. This technique lies in the fact that in the course of drawing gouache is applied only horizontally.
First of all, let's draw the dark fragments of the picture, and only then we depict the highlights with a light color. As a result, we get the desired color without traces of dirt.

Gouache painting techniques
Among the gouache painting techniques known to artists, the following are common:
- A wet layer of paint on a layer that has not yet dried. In this case, the paint lays down tightly and dries for a long time. This method is more suitable for watercolor painting.
- With a dry brush, gouache paints are applied to the dried layer.
- With the help of a sponge, a textured picture is created. This technique is ideal when we paint an autumn landscape, it is easy to depict the bright colors of golden autumn.
- A beginner will cheer up and help overcome the excitement of the technique of splashing paint on the canvas. It is enough to moisten the brush in paint and spray gouache on paper or canvas. It turns out a bright and beautiful painting. Be sure to learn this method of applying paint, which helps to train your hand.

Of course, we can't paint a picture without the right brush. It is advisable to choose brushes made of nylon, goat or pig hair.

On the video: how to beautifully draw the sky with gouache.
Types of gouache
Gouache is suitable for drawing on cardboard, paper, canvas and other surfaces. But not every gouache has such universal properties. Consider the main types of such paints:
- Suitable for application on surfaces intended for painting only. It is absorbed into the material and allows you to apply a second layer, making the colors in the picture more saturated and bright.

- It has a more saturated pigment and bright coloring abilities. She decorates theatrical scenery. Children's gouache contains PVA glue in its composition, so it dries quickly. It is convenient to work with such gouache on plywood, ceramics or canvas. But acrylic paint fits perfectly on any surface, and after drying it is not washed off and does not lose its original color.

- Fluorescent gouache. Amazing in its properties and quality. Under the influence of ultraviolet rays, it glows. The color is too bright, which gives the drawing a special beauty.
A step-by-step method helps to comprehend the basics of gouache drawing even for children. Such lessons will allow you to master this wonderful art and learn how to draw in a certain sequence, choose the right colors to reflect the real beauty of nature, representatives of the flora and fauna on canvas.
It is necessary to create pictures of nature, like drawings on any other topic, from a pencil sketch. The easiest way to draw is to start at the top of the canvas or paper. As a rule, the sky is at the top, which is painted blue along the pencil contours.
Clouds are painted with whitewash, brushing white highlights across the blue sky.

The mountains are depicted in brown colors, and the vegetation in green tones. The trees below are depicted in lighter or darker green gouache. The main thing is that the colors in the picture look like in reality. Paints can be mixed directly on the sheet, periodically changing the water. For the image of fine lines, you need to choose the right brush.
When using gouache, you must adhere to the following tips:
- You can buy gouache in tubes or in jars, everyone chooses the most convenient packaging for themselves.
- The colors you need to choose are those that will be needed to work on the picture.
- Samples need to be done on the palette, only picking up the right color, transfer it to the canvas.
- If the paint cracks, a little gum arabic is added to it and mixed thoroughly.
- To apply the next layer, you need to wait until the previous one dries.
- It is advisable to cover the picture with varnish after drying.
Having comprehended the technique of drawing, you can achieve success in artistic creativity. Moving step by step, from simple to complex, novice artists gradually master the technique of gouache painting. Below are video tutorials, the task of which is to help depict the selected plot on the canvas as accurately as possible. This step-by-step approach allows you to quickly learn how to work with paints such as gouache.
Gouache drawing lessons for beginners (2 videos)
More ideas for drawings (27 photos)


Anything can be painted with watercolors - from a realistic portrait to invented alien worlds. To many, watercolor seems to be a complex artistic tool. But all you really need to learn how to paint with watercolor is just to start. We have selected 11 tips for you, thanks to which you will become 11 steps closer to comprehending the art of watercolor painting.
1. Don't be afraid to get your hands dirty!
If you've never painted before, it's time to get down to business. Open the album, create interesting textures and watercolor stains so as not to freeze in front of a white sheet. Start from them in search of a plot. Colored pages can be bright and exciting or create a calm, melancholy mood. Color or texture may suggest the next step - or maybe you can't wait to draw without them.
Illustration from the book The World of Watercolor.
2. Find your watercolor paper
The result of the work largely depends on the quality of the watercolor paper. Go to a bookstore and pick out 5-10 different sheets of watercolor paper to try out. Be sure to make notes on each sheet (type, weight of paper and the results of working with it). A suitable paper weight for beginners is 300 g/m2, some professionals prefer 600 g/m2. There are other types of watercolor paper, such as NOT paper and paper with a rough texture, or cold pressed paper.

3. Use professional paint
Even novice artists should purchase professional watercolor paints. Unlike cheap analogues, art paints lay down and spread beautifully on paper.
“I prefer tubes over cuvettes: firstly, you don’t have to wait until the paint softens and becomes usable, and secondly, it’s easier to create rich dark mixtures with tube paint.”Billy Showell
It is true that artistic paints are more expensive, but they will also last longer. They are better bred and therefore not consumed so quickly.
Advice. Try out new paints and other art materials as often as possible. Experiment. Don't become a hostage to one habit
4. Observe and consider before taking up the brush
Before drawing, study the structure of the object. Take a look at it as if you were seeing it for the first time, carefully consider, take notes, sketch, get comfortable with textures and details that you never paid attention to. For example, watch the spiral arrangement of the leaves or the whorls along the veins of the stem.

You get a double benefit from drawing plants - first you meditate, looking at it, and then you get real pleasure from drawing. Isn't it wonderful? @miftvorchestvo
Try to mentally break down what you see. Select the main shapes. See how they overlap. Imagine the landscape as a stage setting. Pay attention to what is closest, what is farthest.
5. Learn to mix colors
Try mixing colors to see what shades you can achieve with your paint set. Mix two colors first, then add a third to them. Experiment!
You will love to create such beautiful colors and variations of shades and tones, the number of them is almost inexhaustible.
Focus on yourself. You can make either very realistic drawings or very non-trivial ones. Your task is to collect paints whose properties you will know, which will allow you to create the desired shades with a guaranteed good result.

By mixing pure pigments, you can create cool, warm, or greyish versions of a single color. Illustration from the book "Song of Color"
6. Start with economical expression
If you are making pencil sketches or sketches, you can diversify your watercolor drawings by making accents. It is not necessary to color the entire page; sometimes a few successful brush strokes create the most powerful effect.

Careless dotted strokes in watercolor in sketches are the signature style of Felix Scheinberger. Illustration from the book "Watercolor Sketching"
7. Use liquid watercolor primer
A liquid watercolor primer is applied to the paper before work begins and makes it easy to remove dried paint if necessary. This is especially important when working with intense or persistent pigments: you can not be afraid to “smudge” the paper in the highlight area. Before using it, practice in a sketchbook, as the surface for drawing will be quite slippery.
To remove paint from those areas where it was not needed (inadvertently went beyond the edges or you need to make highlights) - just wash off the paint with a clean, dampened brush or sponge.
8. Learn the art of glazing
Glaze artists call the technique of obtaining deep iridescent colors by applying translucent paints on top of the main one. The glazing technique is a great way to convey the finest color range. Paints are superimposed very delicately, layer by layer, and after drying, the details of the last layer are worked out.

Illustration from the book "Song of Color"
9. Dry brush technique
This technique can be used to paint animal fur or small hairs on fruits like kiwis.
Pick up the paint on the brush, remove the excess with a napkin. Straighten the brush hairs. Apply the paint to a dry surface previously painted in the background color. Work in small strokes in one direction, simulating the hairs on the surface.

Kiwi in the technique of dry brush. Illustration from the book


