In this short tutorial, I'll show you how to quickly and easily draw a wavy line in Photoshop! The creation process is very simple and you can remember it without much effort. The only thing you will have to face is to learn how to select the desired bend and wavelength in the line.
1. Let's start by creating an area on which there will be a wavy line
2. Select the desired section of the area, along the edge of which a wavy line will pass

3. After selecting in the “Quick Mask” mode (Quick Mask, Q), distort the selected area with the Wave effect. Menu path: Filter → Distortion → Wave (Filter → Distort → Wave):


4. Then We return from the mode “Quick Mask” (Quick Mask, Q) and get a suitable selection area:

5. Crop the selected area:


That's it, you've drawn a wavy line or wavy edge on the block. This technique is sometimes used in the design of landing pages, so you will definitely need it! As I said, the main problem here is the height and width of the wave step, take the time and practice to understand what kind of wave is obtained with one or another change in the settings.
Of course, one of the simplest and most commonly used elements in drawing is the line. Adobe Photoshop is no exception. Especially if you plan to come to grips with the study of website design.
One of the advantages of the Photoshop program is the interchangeability of actions. You can achieve the same result in many different ways. Now we will explore several options for command sequences with which we can make a line in Photoshop.
Let's start by creating a new document. A 1000 x 1000 pixel document is fine for us. A detailed description of creating a new document in Photoshop can be found here.
Let's start with the line tool. We will find it on the tank panel.
Now let's set the characteristics of our future line.
Let's set the line thickness. I decided that a thickness of 4 pixels would suit me. If you wish, you can choose her style. I'll stick with the simplest.

Let's decide on a color. You will also find the icon for choosing the main color on the sidebar. On click, a window for choosing a color is called.

Well, now everything! We draw. We make a click on the workspace and drag a line with the mouse.

Now our line is a smart object. You can turn it into a regular layer in the layers window using the "rasterize layer" command.

The line is ready. As you can see, drawing a straight line in Photoshop is very simple. We have analyzed an elementary method, which, despite its convenience, has a number of limitations. Let's break down the second one and draw a line with the pen tool.
It should be noted that in this case it is worth changing the brush or pencil settings to the appropriate ones in advance, because your line will repeat these outlines. Therefore, let's set up the pencil tool together. Select it from the sidebar. And click on the workspace.

Set the following pencil settings. How to choose the color mentioned above.

Look for the pen tool in the sidebar.

We make two clicks on the workspace. It should be noted that if you want to make the line even and strictly horizontal or vertical, hold down the shift key while clicking.

Click on the line with the left key. In the drop-down list, select the command "outline the path."

Outline the outline and click again with the left mouse button. Select the "delete contour" command.


So, the line is ready! In just five minutes, we learned two ways to draw a straight line in Photoshop.
25.01.2017 28.01.2018
Hello to all Photoshop lovers!
It is not at all difficult to draw a straight line in Photoshop, it is enough to move the mouse cursor, but, alas, it does not always turn out to be even with this movement. In the lesson we will learn how to draw straight lines.
To make the line in Photoshop smooth, then hold down the key SHIFT and you will draw a straight line in photoshop. This allows you to draw straight horizontal and vertical lines. You can also draw diagonally, for this you need to click once with the left mouse button on the area where the line begins, the second time where it ends (while holding SHIFT). This will draw a straight line at the given coordinates.
There are several ways to draw straight lines in Photoshop by giving them color, thickness, and other styles. Usually the following tools are used: Brush, Pencil, Pen, Line, Rectangular area. Which tool is best suited for the task is up to you. Each method has its pros and cons.
Draw a straight line with the Brush Tool
The easiest way to draw a line with a tool Brush (Brush Tool). Create a document in Photoshop (ctrl + N) with arbitrary size, I have this 800x600 pixels:
Activate the tool Brush (Brush Tool). Tool call hotkey - B.

Top settings panel change tools if necessary size and rigidity brushes:
Let's draw a line:

Some kind of it is not quite even, you will reasonably notice, right?
To draw a perfectly straight line, you need to hold down the key before drawing Shift, draw a line and release the key. Here is the straight line:

Keypress method Shift before starting to draw a line, it helps to draw a strictly horizontal or vertical line at an angle of 90 degrees, but if you need to draw a line, for example, diagonally, you must first click the mouse button at the beginning of the line, hold down the key Shift, draw a line, then release the mouse button and Shift.
Draw a straight line with the Pencil Tool
Tool Pencil Tool is in the same tool group as the tool Brush, tool call hotkey - B.

Drawing a line with a tool Pencil Tool similar to drawing brush- make a mouse click at the beginning of the line, hold down the key Shift and draw a line.

Draw a line with the Pen Tool
To draw a line with a tool Feather it will take a little more time than in previous cases.
Activate the tool Feather (Pen Tool), tool call hotkey - P.

Remember to make sure the tool Feather is in mode "circuit". You can view it in top panel tool settings:
Create a new layer, click on the icon for creating a layer in layer panels:

Draw a straight line - just put two dots. To draw a horizontal or vertical line, hold down the key again Shift:

To start drawing a new line, hold down the key ctrl and click on the canvas, if this is not done, the lines will be created continuously.
Draw arbitrary curved lines and hold down the key at the end ctrl with a mouse click on the canvas to complete the lines.

The lines are ready, but, unfortunately, they are only visible in Photoshop in the tab contours (Window-Paths (Window-Paths)), if you save the image, for example, in jpg* format, the lines will not be displayed.


In order to make them visible, we return to the tool Brush, in top panel tool settings size, brush hardness and if necessary, select the brush itself. We need a round brush:

Choose a color:

Activate the tool Feather, right-click on the canvas and select the item Stroke Path:

The following window will open, in which you need to select as the source "Brush", and a tick "Imitate pressure" (Simulate Pressure) it is desirable to remove to get straight lines:

Result:

If you leave a check mark Simulate Pressure, the lines will become thinner towards the ends:

Draw a line with the Line tool
One of the most common ways to draw a straight line in Photoshop is with the Line. Located in the left panel:

The great thing is that you can easily adjust the color and thickness of the line:
Clamped SHIFT I draw straight lines. They are created by the shape-from-vector tool. You can easily draw a vertical, horizontal and 45 degree straight line.
.jpg)
Straight line with selection in Photoshop
It happens that you don’t want to bother with the settings of vector shapes and brushes. Therefore, you can simply select the desired area in Photoshop, for example, in the form of a line and fill it with color.
There is a Rectangular Selection tool in Photoshop:

For example, we need a long and thick line in Photoshop. Select the desired area:

Choosing a tool fill and set the color for the future line.
.jpg)
Fill the selected area with color and remove the selection CTRL+D. We have a straight line.

Here are some simple ways to draw a line in Photoshop. We hope you found this information useful! Successes in creativity and good mood!
Lines, as well as other geometric elements, are an integral part of the work of the Photoshop wizard. With the help of lines, grids, contours, segments of various shapes are created, skeletons of complex objects are built.
Today's article will be completely devoted to how you can create lines in Photoshop.
As we know from the course of school geometry, lines are straight, broken and curved.
Straight
To create a straight line in Photoshop, there are several options using different tools. All the main construction methods are given in one of the existing lessons.
Therefore, we will not linger in this section, but immediately move on to the next one.
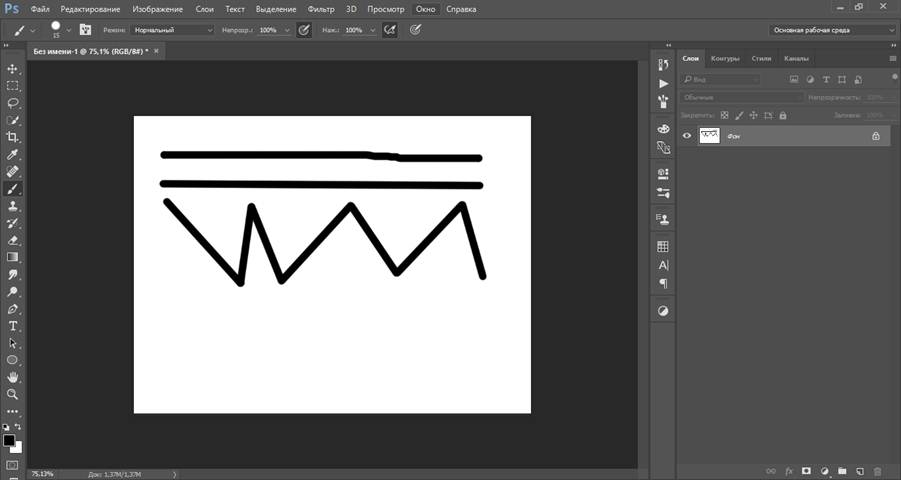
broken line
A broken line consists of several straight segments, and can be closed, making up a polygon. Based on this, there are a couple of ways to build it.
- Open polyline

As we said earlier, such a line is a polygon. There are two ways to construct polygons - using the appropriate tool from the group "Figure", or by creating a freeform selection followed by a stroke.
- Figure.
When applying this method, we get a geometric figure with equal angles and sides.

To get the line (contour) directly, you need to adjust the stroke, called "Stroke". In our case, it will be a solid stroke of a given size and color.

After turning off the fill

we get the desired result.

Such a figure can be deformed and rotated using the same "Free Transform".
- Rectilinear lasso.

With this tool, you can build polygons of any configuration. After setting several points, a selected area is created.

This selection must be circled, for which there is a corresponding function that is called by pressing PKM across the canvas.

In the settings, you can choose the color, size and position of the stroke.


Curve
Curves have the same parameters as polylines, that is, they can be closed or open. There are several ways to draw a curved line: tools "Feather" and "Lasso", using shapes or selections.
- Open
- Closed
This line can only be drawn "Feather"(with a stroke outline), or "freehand". In the first case, the lesson, the link to which is above, will help us, and in the second, only a firm hand.
- Lasso.

This tool allows you to draw closed curves of any shape (segments). Lasso creates a selection, which, in order to obtain a line, must be outlined in a known way.

- oval area.

In this case, the result of our actions will be a circle of a regular or elliptical shape.

To deform it, it is enough to call "Free Transform" (CTRL+T) and, after pressing PKM, select the appropriate additional function.

On the grid that appears, we will see markers, by pulling which you can achieve the desired result.

It is worth noting that in this case the effect extends to the line thickness as well.

- Figure.
Let's use the tool "Ellipse" and, applying the settings described above (as for a polygon), create a circle.

After deformation, we get the following result:

As you can see, the line thickness remains unchanged.
This concludes the lesson on creating lines in Photoshop. You and I have learned how to create straight, broken and curved lines in different ways using various program tools.
Do not neglect these skills, since they help to build geometric shapes, contours, various grids and wireframes in Photoshop.
In this tutorial, I will show you how to create beautiful abstract lines that will come in handy in the design of your work. This tutorial is perfect for beginners.
This is what the final result looks like:
Step 1. Create a new document 800x800 px in size, fill the background with black. Create a new layer above the background, press the P key to activate pen tool(Feather). Create a line like in the screenshot below:

If you can't draw a curve, no big deal. To do this, hold down the ALT key and drag the end of the curve to edit its shape:

Press B to activate brush tool(Brush), select a 1 px brush:

In the window color picker(Color selection) select the desired color:

Activate again pen tool(Pen) (P), then right-click on the created curve and select Stroke Path(outline stroke):

Choose Brush(Brush) from the drop down menu, make sure the option is Simulate Pressure(Simulate pressure) is active, and click OK:

And we get such a beautiful curve:

Step 2 Using the process described above, we create three more lines. Make sure that:
- each line is on a separate layer;
- for the first line, the brush size is 2 px, the second - 3 px, the third - 4 px;
- reduce the opacity of the layers to 80%, 60% and 40%.


We correct the location of the lines and get the following result (4 lines on 4 layers):

Step 3 Create a group "Lines" Layer - New - Group(Layer - New - Group) and move all 4 layers with lines into it. Duplicate the group once and merge the copy of the group into one layer (CTRL+E). Reduce the opacity (opacity) of the new layer to 70% and move the lines below and to the left to create a depth effect:

We continue to duplicate the layer to create more lines:

Now we need to color the lines a bit. To do this, use an adjustment layer. Layer - New Adjustment Layer - Hue/Saturation(Layer - New Adjustment Layer - Hue / Saturation) for layers with lines (do not forget to create a clipping mask for the adjustment layer CTRL + ALT + G).

Choose any color you like:

We continue to add more colors. You can use Free Transform(Free Transform) (CTRL+T) to adjust the angle of the lines:

We also adjust the size of the lines:

Step 4 Now let's add some gray lines. For this, we pass Image - Adjustments - Desaturate(Image - Adjustment - Desaturate) or SHIFT+CTRL+U to desaturate one of the layers:

By blending the gray lines together with the rest:

And we get the following result:

Step 5 Almost finished. Now merge the layers with the lines that we created into one (CTRL + E), then duplicate them, rotate, change position:

Let's add abstract dots around the lines to diversify the work. To do this, set up the brush as shown below (press F5 to bring up the brush options window).


