Sketch illustration for The Little Prince - in the interior.
How to draw the "Little Prince" Exupery?
Now I will tell you step by step.
How to draw an illustration for any work depends not only on the plot, but also on the goal. For example, maybe you want to show your unique and original vision or the idea to just please yourself and people.
Recently, I was commissioned to draw an illustration for the wonderful fairy tale by Exupery "The Little Prince". This task was greatly complicated by the fact that the book was originally illustrated by the author himself, and these drawings are already considered canonical. Somehow it seems strange to deviate from the canon and make something of your own.
But the fact is that it was necessary to draw a BIG picture - A1 - a very serious size. And here there is a type of dependence - the larger the picture, the more details are required. It's not necessary, but, you know, large, concise images often look... bald, or worse, intimidating. In general, if Exupery's pictures look amazing in the format of an A5 book, then for a whole Whatman paper it will be a completely different calico. So such things - it was necessary to "reinvent the wheel" and at the same time - ANOTHER. What stories can you choose?
- Little Prince and Rose
- The prince visits different planets
- The Little Prince and the Fox
- The Little Prince and the Pilot
- Conversation with a snake
- The prince flies with a flock of migratory birds in space
All these options flashed through my head in a whirlwind, but it immediately became clear - we need a scene - the Little Prince and the Fox. Good. I like foxes more than all the characters in this book, and I will be glad to draw him. And I had already painted and sharpened it to look like Castaneda.
But now it was required that the picture was not abstruse, but sweet. Good. How do we start drawing?
Do you think fox? No, with the choice of direction. You can arrange the composition vertically, you can horizontally.

 The vertical one is not bad, but there is excessive pathos and an unjustified impulse in it. And if the Prince's hand is not raised up, then the sky will be too empty. The second hand of the Prince had to be put on the fox's neck - again in vain - their relationship, according to the book, was not so close. Moreover, it is not clear how to dress the prince. Anyway, after all, I need to proceed from the fact that everyone is waiting for similarities with Exupery's drawings. Dressing up in rich outfits and a crown ... is possible, but absolutely not necessary. In general, the vertical option does not work. But it became clear already when the preliminary sketch was drawn. And I even continued to doubt and, to clear my conscience, I increased both versions of the sketch to size A1. By the way, the enlarged vertical version looked better.

But I still chose horizontal.

Little Prince drawing
So, the Little Prince sits on the grass, hugging his knees, and looks at the starry sky - his planet is visible there. A fox sits a little behind him and also looks - either at the planet, or at the Prince. It is clear that in this pair, the Prince is the leader, and the role of the fox is tamed, led. In order not to draw a raised hand, I decided to send a scarf to the Prince's planet - Exupery's scarf constantly blows in the air without wind and gravity. A couple - the Fox and the Little Prince in the center, along the edges - on the right - a rose bush, on the left - rocks. Roses with their seductions are behind the Prince - this is already a passed stage. Ahead - rocks - The Prince still has to face trials and will need strength of character. The rose on a distant planet is not clearly visible, it is very schematic and located on the side remote from the Earth - the uncertainty of relations, it is possible that reconciliation will not take place.
As the name implies, we will talk about the well-known game. This is a wonderful adventure. At one time, I also went through one game from this series. It was part of The Sands of Time. Fascinating storyline and beautifully detailed. I recommend it to everyone, it's worth it!
Well, today I have prepared Andryukha Lomonosov's lesson. We will find out. Andrey shared with me a picture with which I made a drawing lesson:
I'll be honest, it wasn't easy! Many different details make the task very difficult. But nevertheless, something happened, see for yourself. Let's get down to business.
How to draw the Prince of Persia with a pencil step by step
Step one.
Let's sketch the future drawing. Circles denote the head, body, position of the arms and lower body. Here the legs are not visible, and this simplifies the task a little.

Step two.
Now let's shape the torso, draw a strong male torso. In the right hand we will depict the contours, and on the left strokes.

Step three.
On the face, add the eyes to the nose and the shape of the lips. We draw a headdress, and a tunic on the chest.

Step four.
Now the most difficult moment. He has too many different details on his clothes. I will not describe each of them in detail, here from the picture you can see everything.

Well, the final stage.
It is necessary to make the contours clearer and erase the auxiliary lines. You can also decorate with colored pencils.

That's actually all. Try to draw it, it's not as easy as it seems at first glance! Attach your work below the article and write comments!
As is clear from the title, we will talk about the character of the well-known game. This is a great action adventure. At one time, I also went through one game from this series. It was part of The Sands of Time. Fascinating plot and beautifully detailed sword fights. I recommend it to everyone, it's worth it!
Well, today I have prepared a lesson at the request of our reader Andryukha Lomonosov. We will find out. Andrey shared with me a picture with which I made a drawing lesson:
I'll be honest, it wasn't easy! Many different details make the task very difficult. But nevertheless, something happened, see for yourself. Let's get down to business.
How to draw the Prince of Persia with a pencil step by step
Step one.
Let's sketch the future drawing. Circles denote the head, body, position of the arms and lower body. Here the legs are not visible, and this simplifies the task a little.

Step two.
Now let's shape the torso, draw a strong male torso. In the right hand we draw the contours of the sword, and on the left strokes of sharp claws like a demon.

Step three.
On the face, add the eyes to the nose and the shape of the lips. We draw a headdress, and a tunic on the chest.

Step four.
Now the most difficult moment. He has too many different details on his clothes. I will not describe each of them in detail, here from the picture you can see everything.

Well, the final stage.
It is necessary to make the contours clearer and erase the auxiliary lines. You can also decorate with colored pencils.

That's actually all. Try to draw it, it's not as easy as it seems at first glance! Attach your work below the article and write comments!
- Cartoon character Ben 10;
- Naruto;
- Sasuke;
- Gnome;
- Raphael from the Teenage Mutant Ninja Turtles;
- Iron Man (Iron Man);
- Captain America;
- Sakura Haruno;
- Sonic;
How many fictional beauties have we seen on our TV screens? There are so many of them that probably even the authors themselves will not be able to name them by name. The most famous in the world are: Cinderella, Aurora, Ariel, Belle, Jasmine, Snow White, Pocahontas, Mulan, Tiana and Rapunzel. Here they are, charming princesses: The very first full-length animated film in history was called Snow White and the Seven Dwarfs. Today we will draw one of the Disney cartoon princesses - Snow White.  Surprisingly, it took three years of work and the strength of 500 artists to create this film masterpiece. The cartoon consists of a million drawings and costs about one and a half million dollars! This is not our first lesson from this series, in the future we will have more lessons on how to draw Disney princesses. We have already considered how to draw Mickey Mouse, the Little Mermaid and the Tigger (from the cartoon about Winnie the Pooh). And now we go directly to the lesson.
How to draw a princess with a pencil step by step
First of all, we need to depict the girl's face and the shape of the hair.  Then we move on to drawing the details: lips, nose, eyes
 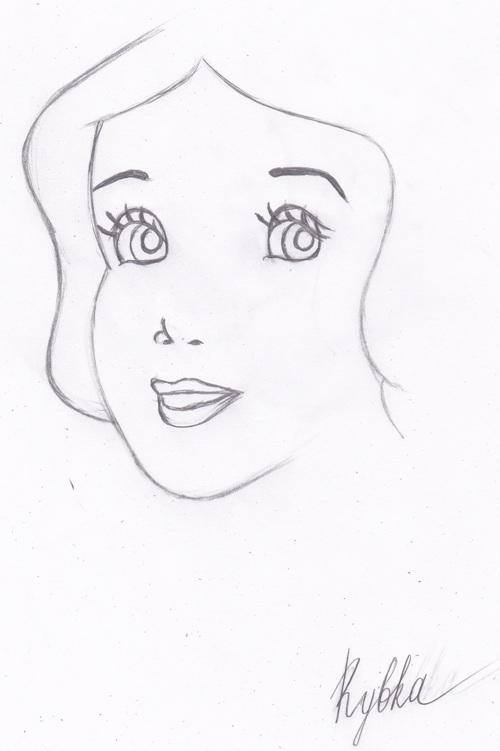 Now let's add the neck, hair and bow.
  Everything, the drawing is ready. It remains only to color it with colored pencils. Here's how I got it:
  Leave your comments and show your work. Would you like to draw more beautiful girls? I recommend trying to draw.
Start recreating an artistic painting with a princess. Select the left half of the sheet for her. First, draw a simple diagram. Determine where the girl will have her head, draw a circle in this place. The lady is looking at her chosen one, so her head is slightly turned in his direction. 2 small lines will help convey this. Arrange them crosswise in the right half of the face.
The right end of the horizontal line crosses the circle, at this point the segment turns down and slightly to the left. It was you who depicted the girl's chin. Draw a small vertical line from the bottom center point of the circle-head, it will soon turn into a neck. Next, draw a line from it down and slightly to the right - this is a curved line of the spine.
Draw a circle around it, not reaching the bottom of the spine by a quarter. The remaining line will soon become a thin waist. From its end, draw a symmetrically horizontal oval - this is the place where the hips begin. Draw long lines from it in both directions - the hem of the dress.
From the top of the circle, which runs through the spine, go the hands. Draw the scheme of the left one in the form of a semicircle curved down. This arm will be slightly bent at the elbow. The right hand of the princess is lowered down.
It's time to give the beauty shape. Draw lush hair, draw a thin neck below the chin, which then goes into the shoulders. Draw them on both sides of the circle that crosses the spine. Shape your hands. Draw the brushes, the one facing the prince is in profile so only the thumb and forefinger are visible.
At the level of the armpits, focusing on the same circle-body, draw the chest and the body of the beauty, then the thin waist. Draw a few vertical lines on the hem of the dress - these are folds. Draw a line for the neckline. On the face - eyebrows, eyes, nose, located in a semi-profile. Erase the guide lines.
Prince
The prince will be drawn on the right side of the canvas. Its scheme consists of almost the same figures as the base of the princess. Below the head-circle to the left, draw a chin, draw a profile of the young man's face. The line of the spine goes almost vertically - turning slightly to the right. It is crossed by a circle-body. Shoulders are located in its upper part. From the left there is a line down - the forearm, then, horizontally to the left, this is part of the arm from the elbow to the hand. The right hand comes out of the shoulder and goes down.
Below the circle-body is the waist line and the oval-thigh. Of these, draw 2 vertical lines. Just below the middle on each of these segments, draw small circles - these are the knees. The legs are slightly bent in this place.
Dress the painted prince in a long camisole, a mantle may be tied around the shoulders. The lower part of the attire is close-fitting, on the legs are boots.
Erase the guide lines. It remains to add soft strokes with a pencil to depict the hair, the folds on the young man's clothes, and the drawing of the prince and princess is ready.


