If you don’t have the opportunity to spend at least a few years on thorough and painstaking drawing training, and then a detailed mastery of the editor’s capabilities, and you still want to draw ... Perhaps these tips for beginners will help you at least avoid mind-blowing pictures and save a lot of time in stepping on a rake.
I will say right away - you still need to learn the basics! But if you don't have the time or opportunity, then you have two options: don't draw at all, or learn as you go. If you chose the latter, feel free to read on.
Remember that everything that will be forbidden to you, of course, can be used, but you need to do this only when you understand what to do with it, otherwise the bumps from the rake will grow, and there will be no result.
TIP 1. Standard brushes in the form of grass, stars and other nonsense are evil for you for the next few months of communication with the tablet and Photoshop.
This is evil, at least until you realize that you can do just fine without them. In the meantime, we strictly remember that the first months of your close communication with the tablet, your only brush should be ... a standard round hard brush. Okay, it can be square, rectangular, and it doesn't really matter what shape. Solid. Not soft.
A soft brush, of course, is also useful, but for a start it is best to forget about it, or if you still encroach on it to paint a little - do it in small doses and leave a hard brush as a priority for now. For a couple of years, I heard so many phrases like "if someone told me this," that I was unambiguously convinced that this advice was correct. So - trust me! Or kill.
Many artists make (or borrow from others) their own basic brushes over time. They usually have torn edges for better blending. But for you, all this is now completely unnecessary. Forget about all those brushes that are full on the Internet. Learn to master at least a little round rigid, and only then complicate it.
If the desire to use other brushes is too great - go to Photoshop and delete all the brushes except for the hard round one ... okay, and still soft, and forget all the known ways to create brushes. For a while, of course.
Do you urgently need grass, leaves and butterflies? So what's the deal? Draw!
TIP 2. Your first drawing or the next next one, if you have already drawn, should not be your favorite cat, dog, brother, sister, mom, dad, but ... tone stretching.
And .. no, not to train the pressure of the pen and the evenness of the lines, but in order to learn how to make smooth transitions. Most beginner artists suffer from the fact that they simply do not know how to mix colors and smooth planes. And, of course, the easiest and fastest solution is to use a soft brush, and this, in turn, leads to terrible results, which then lead especially faint-hearted artists to psychological trauma. Okay, the last one is a joke, but the fact remains. Therefore, before you start drawing, whether it is desirable or not, you definitely need to learn one simple but insanely useful technique.
So from this:
We'll get this:

Well, we'll deal with color later.
So, the most optimal and successful way to mix colors and create a smooth transition is to use a hard brush, as it allows you to create many transitions and maintain the "clarity" of the picture, which gives it liveliness. A soft brush allows you to seemingly make smoother transitions:

But such smoothness is rarely beneficial. It is good for creating a general volume of the background, but whatever one may say, if you look closely, you can see that there is a feeling of blurring, and when this method is applied to a drawing, for example, a portrait of your sister, everything looks even worse.
It's up to you, of course, which option you like best and ideally you should be able to use both, but you need to know when you can use a soft brush and when you shouldn't. In the meantime, we still do not know this well - the best option is to listen to smart aunts and uncles, whom I shake like a ripe tree, and do as they say.
So, let's start our stretching.
In order to make such a simple stretch, you need to arm yourself with a hard round brush. Personally, I prefer for the base brush to turn off the pen pressure reaction, which would determine the thickness of the line, but the reaction to transparency is just that. But this is already an amateur. With Photoshop settings, I believe, everyone can make friends if they are not too lazy. And I will talk about something else.
1. So, we take black and paint over half of our drawing with it. Well, or approximately the part that, in your opinion, will be ... a shadow.
2. Now we take and lower the parameters Opacity (Opacity) and Flow (Push) in the brush (they are located at the top of the menu) to about 40-50%. The lower the Opacity value, the more transparent our color will be, and if you draw a line, then the bottom layer of color will also be visible through it. Essentially, Opacity can be compared to paint density. The higher the value, the higher the coverage. The Flow value determines the density of the "flow". Roughly speaking, by combining these two parameters, you can achieve different effects from the brush without getting into its other settings. But back to our sheep.
So, with the chosen black color, we paint over half the white color. Moreover, this must be done in one motion, without tearing off the pen. If you tear it off, then the previous stroke will cover the one already drawn and blending will occur where we do not need it. Now we take the new resulting color with a pipette and paint over half black with it. As a result, we will get something like this:

3. Next, we reduce the diameter of the brush, well, I think you understand why? And we take the resulting color on the left (on white) and paint it half white, and then do the same with black. And we get something like this:

4. I think it's clear what we do next? We start going from left to right or from right to left (whichever is more convenient for anyone) and, taking a color, paint over half of the neighboring one. Then we take the remaining piece of the unpainted color and paint over the next piece by half, and so on. In general, we actually did something like stretching.

It is crooked in places, but I did it solely as an example of technique.
5. Now we reduce the Opacity to 15-30% - this already depends on personal priorities, for example, I use within 20% usually or more if the pen pressure mode for the brush works, and we continue to do the same. Again and again. In general, this lesson is made solely for training. As a result of it, you yourself will figure out how best to create transitions. What pressure to choose, how to apply colors. And all this will only help to understand. You are unlikely to be perverted just like that, but sometimes this will be needed.
As a result, we will get something like this:
Once you figure out this simple task, I advise you to try to translate Opacity and Flow to pen pressure in the future. And learn to work that way. Firstly, this will at least reduce your time for constant distractions to change parameters, and secondly, you will learn how to more subtly manipulate pressure in the drawing process, which is already cool in itself!
Now let's discuss color stretching. Here everything is essentially the same. There are only two ways to stretch. More precisely, not so. The method is still the same, but the actions are slightly different and the result is ... different.
Option 1. The transition from one color to another, bypassing intermediate colors. This method is similar to a one-to-one b/w stretch.

However, it is not very good for cases where the colors are far apart on the color wheel. And, as you can see, the color at the mixing point "fails" into gray, which is sometimes not very good for the picture and can lead to "dirt" in the future, but it can be convenient for the background, where the colors should be less saturated than the front plan.
Option 2. The transition from one color to another through intermediate colors in the color wheel. Here the essence is the same, but we add colors that are between our two main ones. I will not explain what a color wheel is and what an intermediate color means. Read color theory and you will find a lot of useful information. Over time, you will learn how to add several intermediate colors at once during the blending process. In fact, this is how drawing happens - by adding and mixing different colors. Discovered America, right? But now we will try to do it in a simple way so that you understand how it all works.
So, first we divide our drawing in half into Yellow and Purple. Then open the palette and take a color somewhere in the middle between these colors, and with Opacity 50% paint over half yellow and half purple. Voila and we get two intermediate colors.


And now the most interesting! Open the palette and go over the entire stretch with an eyedropper. First on the first, and then on the second. Really interesting? We are going through the same range, BUT in the second case, the colors are more saturated and brighter. And that's great, right? By adding an intermediate color, we made our stretch more lively and it was not difficult at all.
Keep this in mind and your drawings will immediately become more alive. This, of course, is difficult to implement right away, but over time you get the hang of it and everything will work out. The main thing to remember about this when you draw.
One aspiring artist asked me to make a video of the stretch because simple steps were not enough for him. He held a pen in his hands for the first time and never worked with Photoshop. I recorded a short video that shows how I did these stretches. It's very simple, but this kind of pen training is actually very useful, especially when working with color. It would be great if you set the Opacity and Flow to pen pressure when you run it. By the way, in this case, you do not have to lower these parameters very low. This can be seen on the video. I use 50% Opacity almost all the time.
A documentary about the unprofitability of CG graphics in cinema as a business. The company that drew Life of PI went bankrupt two weeks before it won an OSCAR. Over the past 10 years, 21 well-known effects studios in Hollywood have closed. Despite the fact that CG is traditionally an industry where people work day and night without days off (as well as video production, by the way) and without guarantees - almost everyone is hired individually for the duration of the project and constantly changes jobs, often leaving their families for months and years . Almost the entire American CG industry is dying due to the fact that Canada has made tax breaks (as well as gamers, by the way - that's why Ubisoft does almost everything there). As a result, artists are constantly swinging from country to country, where there are benefits and the industry is on the rise.
In general, the film is about the time to change the business model - CG artists are the same filmmakers as everyone else and should receive a percentage of the income from the film or hourly pay (like operators, etc.), because, like any creative activity, it is difficult to calculate in advance. Most studios force contractors to work at a fixed price - they say, we pay you 10 million and let's fulfill all our whims. Well, then it started - the director changed his mind, they decided to reshoot the scene, redo it, throw it out and replace it with another one - CG people do this work for free. The loss is borne by the studio and nothing can be done about it.
In 2013, the film's characters did work in two Oscar-nominated films that won Life of Pi. Former employees gathered for a demonstration near the ceremony. When from the stage the employees of the already closed studio tried to tell that the company that made this work had a problem, they were drowned out by the music from Jaws. In addition, Ang Lee, when he thanked everyone from the stage for participating in the film, listed everyone except for the CG artists, who in this case made 70% of the film.
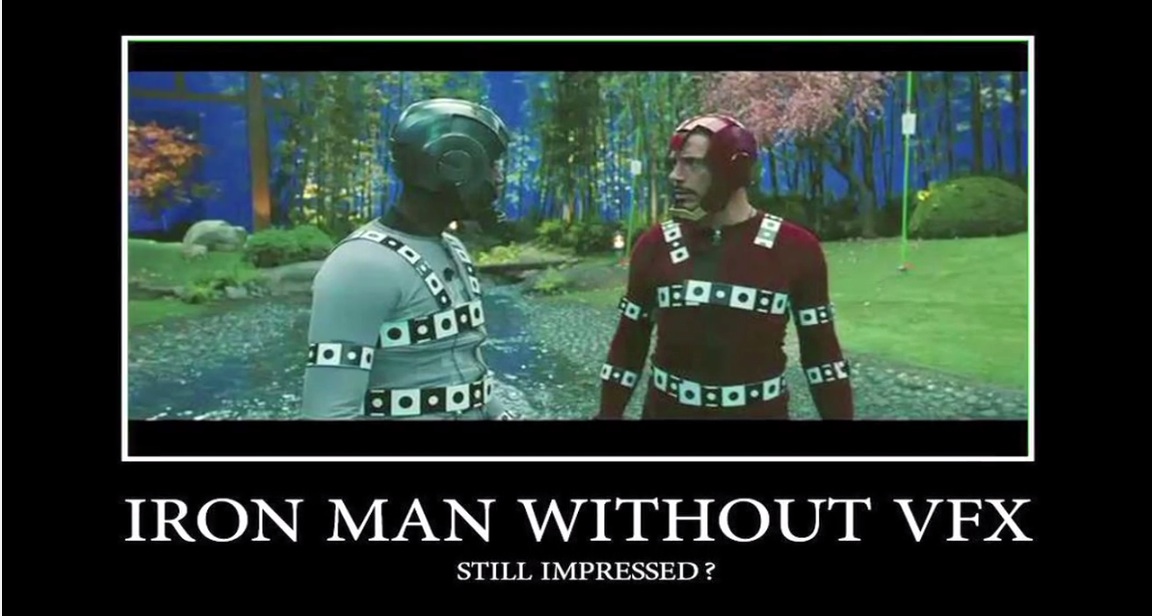
As a result, the entire CG community was just beside themselves. In protest, the artists began to put green screens on their facebook avatars and publish real stills from films without CG. Now the entire VFX industry is trying to develop a common policy for working with Hollywood. 
In principle, all these problems are very, very familiar to us at FXA, although we are not talking about CG. Description of problems with customers and changes in plans - 100%.
On March 3, Hollywood will host a massive showcase of VFX artists against the biggest studios. At the same time, a lobby is being created to change the legislation. In general, the big companies are accused of playing off governments, forcing them to fight among themselves more and more incentives for cinema at the expense of taxpayers, while they themselves profit by setting rental records.
Computer (CG) an artist who creates his works exclusively on a computer is a comprehensively developed person, because to create digital images you need to have a lot of technical knowledge. This distinguishes him from ordinary painters who do not need unnecessary tools other than canvas, brushes and paints.
1. It is believed that for any artist it is necessary to have talent. However, all famous graphic artists and painters claim that success consists of only one percent of talent, the remaining 99% are diligence and work. So, taking one percent as the original value, one can understand that it takes a lot of effort for an artist to be able to create, overcoming all the difficulties that arise, laziness and many other distractions.
Only constant training makes it possible to realize your talent.
2. A computer artist, like any other painter, must have the basics of academic drawing and painting. He must have a firm, full hand, a well-developed sense of composition and eye, as well as correct color perception. Only through diligent training does it become possible to achieve professional mastery in drawing.
3. For the competent execution of digital images, in addition to the classical basics of drawing and painting, additional knowledge is also required, such as a foreign language and mastery of special graphic programs. Without these skills, drawing will not bring pleasure, but will only become "heavy load".

4. Naturally, to create computer graphics, especially for three-dimensional and animated images, you need a fairly powerful computer.
5. A perfectly calibrated monitor with excellent color reproduction and high resolution is a prerequisite.
6. To realize your creative potential as a CG artist, you will need additional devices such as a computer mouse, graphics tablets, a scanner and a digital camera.
When working in vector programs, it is enough optical mouse.
For more accurate and complex drawings, you will need tablet, or it is also called . Graphic tablets have the same formats as paper - from A6 to A3. For professional computer graphics, the largest format is used.

To work with a digitizer, a special pen is required, shaped like a regular pen. This cursor is also called a stylus. A graphics tablet allows you to create a drawing as close as possible to the drawn image on plain paper; a masterfully executed work can be impossible to distinguish from a hand-made creation.
The principle of operation using a digitizer is the same as on a plain sheet of paper, however, "" in this case serves as a graphic device, and the created picture appears in the file and is displayed on the monitor.
The digitizer itself is often more valuable to the artist than the computer itself.
Auxiliary input devices are scanner and camera. It is often easier and more appropriate to draw a sketch on paper, then transfer it to an electronic format. To create the necessary pictures from nature (references), an indispensable assistant comes to the rescue - a camera.
There are already more advanced and expensive devices, such as, on which the image is created on the screen, and the pen has ink. For professional digital painting, such a device is much more convenient than a regular tablet.

7. Also, a computer artist in his work sometimes needs Printer. For printing large formats, you will need plotter. These devices have a fairly high cost and large dimensions. Few artists can afford them to work at home.
8. An important condition is an excellent command of graphic programs, which are indispensable in digital painting. There are many graphic editors, each of which has its own characteristics and advantages.
Any program has its purpose.
Adobe Photoshop is the most common editor, allows you to create both raster and vector images. This program allows you to work in the technique of photo art, create animated images.
Photoshop provides a wide range of different effects. In addition, this graphic editor has many convenient ways to save and edit files. The possibilities of the program are so great that there are very few people who have studied all of them.
Corel Painter also refers to no less popular programs among CG artists. This graphics editor has more than four hundred varieties of brushes. Corel is designed primarily for creating vector images, so a huge variety of effects and functions are not required in it.
Adobe Illustrator- similar in purpose and function to Corel Draw vector program.
3D Max, Maya, ZBrush- editors for 3D modeling, which require a powerful, at least 4-core, computer to work with. There are many more graphic editors, each of which has its own purpose.

Licensed programs cost a lot, but for computer artists for professional work, it is still recommended to purchase this version in order to avoid trouble with the verification authorities. Firms that produce these graphic programs are increasingly paying attention to copyright compliance.
There are alternative free programs, the most common of which is GIMP. A CG artist most often prefers one of his favorite editors, but the use of other programs is often necessary.
9. For an artist who specializes in digital painting, having the necessary skills, equipment, tools and knowledge of graphic editors will allow him to fruitfully create. But he, like any creative person, needs the approval of contemplators. Moreover, the more recognition, the better for the development of his creative potential.

10. The result of considerable work and diligence is the demand in the service market.
The main stages of creation
Often, novice artists wonder how to draw a neat lineart. Most experienced artists who use it in their work create it iteratively. I use 3 main stages: choosing an angle, searching for a design, and carefully working out.
Trying to do everything at once without sufficient experience leads to a lot of effort and time, because. usually one of the three points is not fulfilled at an adequate level, and has to be redone.

Dividing into iterations allows you to concentrate on a small amount of work. By choosing your angle in advance, you can start looking for a design without overburdening yourself with too much control over perspective. And, since in the process of searching for a design, one way or another, excess “dirt” will form in the drawing, you can not waste effort on excessively neat lines. At the final stage, we no longer need to look for a design and angle, so we can circle everything quickly and accurately.

Next, we add occluded. Occlusion is a shadow from diffused light. Our surrounding world is arranged in such a way that scattered light is always present when there is at least one light source. We see it around us all our lives, and we can read it, regardless of whether we know about its existence or not, and whether we understand the principles by which it works. Adding okluzhen to the drawing helps to achieve a better transfer of volume.

The next step is color. When choosing colors for individual parts of an object, you need to make sure that they look good together. There are no bad or good colors, it all depends on the chosen combinations.

In a separate layer, draw all own and falling shadows of the details and the entire object as a whole.

We adjust the intensity of the occluded so that it does not black out our oscilloscope.

We show the influence of sunlight and add reflections from the surrounding space.

At this stage, our task is to show the difference in the properties of materials. Some of them reflect light well, some, on the contrary, absorb. Some parts have smooth surfaces, while others have rough ones. All this should be reflected in their appearance.


Add markup to the screen and trace from the beam.

In post-processing, we add sharpening and slightly adjust the colors.


You can find the full lecture here:
Using 3D packages
As you can see, only a 2D editor was used to create this picture. This is more than enough to depict such a simple object. However, when it comes to complex scenes, the illustrator faces a number of difficult tasks, one of which is building the right perspective and lighting. In such a situation, the best solution is to use a bunch of 2D and 3D editors. As a 2D editor, I use the "industry standard" - Photoshop. And for three-dimensional modeling, I chose Zbrush and Maya for myself. The first one is the most popular sculpting package, and the second one is quite easy to learn, but at the same time has some serious functionality.Below are the illustrations I created with this combination of tools:


This technique for creating illustrations is quite easy to learn. Here are examples of my students' work:


Duration: 8 lessons for 2-3 hours
Cost: 3900 rubles.
An extensive course in computer drawing, from which you will learn the principles of digital drawing and gain the necessary skills to create 2D graphics and implement ideas for computer games. During the training, you will draw your own original character, game space, objects, and more.
For whom:
The course will be useful for aspiring CG artists, graphic designers and traditional artists who are looking to expand their skills and master new possibilities in drawing. In other words, this course will be useful for artists in any field of digital painting.
Peculiarities:
Similar courses in drawing studios in Moscow and St. Petersburg cost 20-30 thousand rubles. plus train tickets, accommodation and meals. Not everyone can afford such a pleasure, plus you need to carve out a few days for a trip.
With the help of our course, you will receive the same amount of knowledge, but at the lowest price and in a life schedule that is convenient for you.
Advantages:
- the lowest price;
- video recordings of all lessons;
- step-by-step training system;
- feedback from the teacher;
- analysis of homework;
- individual approach;
- Assistance with portfolio organization.
The video course is designed for 2 months, one lesson per week + homework, only 8 step-by-step lessons for 2-3 hours and 7 homework. For each homework assignment, you will receive a detailed video analysis from the teacher.
You can study lessons and complete assignments at a convenient time for you.
To complete the course, you will need a computer, internet, graphics tablet and Photoshop graphics editor.
For the main group of 10 people - 3900 rubles (cost in the additional group - 8000 rubles). Self-study 2900 rub.
Result / will know, be able
- You will master the basic skills of digital drawing, the principles of creating 2D computer graphics and learn how to bring ideas to life with high quality. This knowledge base will give you a big advantage in developing your skills as a CG artist. Also, high-quality work will appear in your portfolio, which will certainly help you in further employment.
Program
Includes:
1. PREPARATION. Theory, pre-production, setting up Photoshop, tablet, brushes, creating a palette and much more.
2. CONCEPT. Looking for references, drawing sketches.
3. CHARACTER. Consider the whole process of creating a character.
4. SUBJECT. We will develop an inventory for your character.
5. BUILDING. Let's deal with the principles of construction, shadows, volume and more.
6. LOCATION. We create a play space - trees, stones, various textures.
7. INTERFACE. We will draw icons and buttons, work with fonts, touch on usability and much more.
8. CONCLUSION Let's sum up and design the work for the portfolio.
Write about irrelevant information.


