In this lesson we will introduce you how to draw the sea with gouache step by step in pictures and with a description. Step-by-step steps will be presented with the help of which you will learn how to draw a sea with gouache, like this.
You can draw waves on the sea if you understand how the wave moves. Let's draw the background first. Draw a horizon line just above the middle. Smoothly paint over the sky from blue to white near the horizon. You can draw clouds or clouds as desired.
To make the transition smoother, paint part of the sky with blue paint, part with white, and then use a wide brush with horizontal strokes to mix the paint on the border.
The sea itself will also be painted over with blue and white paint. It is not necessary to apply strokes horizontally. There are waves on the sea, so it is better to do strokes in different directions.

Now mix green paint with yellow and add some white. Let's draw the base for the wave. In the picture below, the darker areas are wet paint, just the gouache has not had time to dry.

On the green strip, we will distribute the movement of the wave with a hard brush with white paint.

Please note that the left part of the wave has already fallen into the sea, next to it is the raised part of the wave. And so on. Let's make the shadows stronger under the fallen part of the wave. To do this, mix blue and purple paint.

Mixing blue and white gouache on the palette, draw the next falling part of the wave. At the same time, we will strengthen the shadow under it with blue paint.

Let's outline the front wave with white gouache. 
Let's draw small waves between large ones. Draw blue paint shadows under the near wave.

Now you can draw the details. Spray the foam along the entire wavelength with a brush. To do this, take a hard bristle brush and white gouache. There should not be much white gouache on the brushes and it should not be liquid. It is best to smear your finger with gouache and blot the tips of the brush, and then spray in the area of \u200b\u200bthe waves. It is better to practice on a separate sheet so that you can direct the spray to a specific place. You can also use a toothbrush for these purposes, but the result may not justify the result, because. the splash area can be large. But if you can do it, then that's good. Don't forget, try the splashes on a separate sheet.

Drawing lesson for children from 6 years old
Drawing master class. Landscape with sunset on the sea
Voronkina Lyudmila Artemyevna, teacher of additional education MBOUDOD DTDM, o. Tolyatti
This master class is intended for teachers, parents, children from six years old.
Target: Creating a landscape with a sunset on the sea
Tasks:
- get great pleasure from the process of drawing
- in 20 minutes to create a "masterpiece", which will become not only a decoration, but also a talisman of the house
- relieve fatigue, improve mood, self-esteem
- to promote the education of the individual, to cultivate a reverent attitude towards native nature.
Purpose: interior decoration, gift.
Landscape is a special genre of painting. It combines the feelings awakened in the artist from the contemplation of nature, and the skill with which he conveys to the viewer the state of his soul. In this master class, you have the opportunity to truly depict the living colors of nature, the beauty of the sunset on the sea.
It is impossible to be able to do everything, although, in contrast to the same phrase, there is another, no less famous - "a talented person is talented in everything." It's hard not to agree. Perhaps, in reality, something is given to us easier, something is more difficult. But the result depends solely on the determination and desire to achieve the goal. Therefore, even being by nature a person of an absolute technical profession, who never encounters creativity, one can learn to draw. You can start, for example, by drawing a landscape.
In this master class, we will create together with you a landscape with a sunset on the sea.
For work we need
A sheet of white paper, A3 format (I have watercolor paper)
Gouache: yellow, orange, red, ruby, purple, black (gouache should be "live", i.e. soft, sour cream consistency).
Brushes (I use synthetic brushes #3 and #1, sharp)
A jar of water.
Progress:
Select a sheet location. It can be positioned both horizontally and vertically.
I placed it horizontally. Unlock all colors.

I have always loved watching the sunset.
The sun spills colors across the sky.
Today, like many years ago,
I am immersed in this story again.
With brush No. 3, draw a horizon line in the middle of the sheet with yellow gouache.

With the same paint we begin to paint the sky

Next, add a little orange to the yellow paint. We make a color stretch from yellow to orange


Adding red paint to orange paint

Add ruby to red paint (you can skip this step)

Add purple color to ruby color

Turn the sheet upside down and repeat all the previous steps.


Next, draw a black line along the horizon line

Let's draw a silhouette of mountains

Let's paint the mountains. I take purple and black paint on a brush

With small strokes with brush No. 1, draw the reflection of the mountains on the water

Let's draw a silhouette of a yacht

Let's paint over, draw a reflection on the water

Let's draw a mast. Just draw a straight line up

Let's draw a sail

Let's draw more yachts in the distance

Finishing touch - seagulls

The work of my pupils, students of grade 3


As you can see, they showed imagination - palm trees, dolphins appeared
More work, painted at the summer camp today


It remains to frame the work under glass and the gift is ready. But that's another story.
These are my artists - satisfied and happy

I love the beauty of the sunset...
Especially when it's on the water...
The brilliance of the waves of burning wondrous rolling ...
Everything brings out the best in me...
Takes your breath away...
And my heart sings with bliss...
For the body - it's millet temptation ...
He is called to a feat from afar ...
You can't enjoy this beauty...
Sunset on the sea is Heaven on Earth...
You can fall in love without noticing...
And get sick of all this beauty ...
I love the sunset marvelous glow ...
The sunset really became to me like a native ...
I'll throw it away, I'll remove all doubts ...
Everyone loved the sunset with his soul
(Vladislav Amelin)
Thank you for your attention
CREATIVE SUCCESS TO YOU!
The sea... There is hardly anyone who does not like the sea. He was sung by musicians, poets composed poems about him. It hides many secrets, and rarely reveals them to anyone. Mankind has always been curious about what is there, under the sea surface, what treasures, outlandish fish and plants? The sea does not give an answer, gently splashing on the coastal stones and sparkling, basking in the sun. Only the sea is deceptive and does not like jokes. Today it is obedient and calm, and tomorrow it foams angrily and rolls huge waves, destroying everything in its path. Let's try to draw the sea with a pencil, its bizarre coastal waves and the seashore. It is much easier to depict the sea with paints, precisely due to the color and shades, so the task before us is difficult. Step by step we will try to draw the sea with a pencil in stages, I hope you succeed.
- Prepare a thick sheet of matte paper, but not smooth, otherwise the stylus will slip and deep shadows are unlikely to come out. In addition, this lesson will require shading on paper, and smooth paper is not at all suitable for this. You need at least two pencils - hard and soft. We draw a preliminary sketch. We designate the horizon, a line of low mountains in the background and the water's edge.

- It is important to show how the waves move and roll. We draw long and short strokes, filling the entire area of the sea. But we do them at a certain angle. On the left, the lines will lie a little wider, and on the right, they will seem to gather into a narrow bundle. At the horizon, the hatching should be thicker and denser. This results in the effect of the depth and length of the sea, the feeling that the viewer is standing on the shore.

- We draw distant mountains. Too much detail is not necessary, it is enough to show mountain bulges and depressions, faults in the stones. To do this, it is enough to draw something like small triangles with a dark base. Show part of the mountains more generally, they will be far from the viewer. Leave unshaded areas too, so that there is a feeling of being illuminated by the sun. Mark the edge of the earth, a narrow strip at the foot of the mountains.

- With a very soft pencil, we begin to tint the sea. Do the tinting exactly at the same angles as in the previous sketch. At the same time, the water will be completely dark on the horizon, and lighter towards the shore, due to the fact that the depth becomes smaller towards the shore and “lambs” from the foam appear. Try not to shade the sea evenly, remember that the sea is mobile and the waves come from the horizon, increasing in size more and more. And at the same time, each wave is voluminous, has light and shadow. The sea is like a huge silk fabric with folds.

- Now the most important step - try to blend the pencil lines. Do not erase them, namely, lightly rub them on the paper. This can be done with your finger or a piece of soft paper. We leave the darkest stripe on the horizon. We highlight some sections of the waves in the foreground with the help of an eraser. The foam will be the lightest, almost white where it touches the ground or at the very top of the ridge. Imagine how the water foams, how splashes fly, how waves roll onto the shore, as if covering it. Part of the water will simply spread and soak into the sand, but its contours on the ground will still be visible for some time.

- We make the most contrasting waves in the foreground. It will be darkest in the depths of each wave, under the white edge of the foam. At this stage, we work more with an eraser. For convenience, it can be "sharpened", that is, with a sharp blade, cut the edge obliquely. They can "draw" snow-white foam. Add contrast to the waves with a soft pencil and immediately erase the excess with an eraser, “outlining” the splashes. If the paper is soft, loose, then the pencil drawing can be easily corrected in this way. Work very carefully, without smearing the drawing. Sometimes it is enough to simply touch the surface of the paper with an eraser to get picturesque “lambs”. Such a drawing requires some virtuosity, but still try.


Only an experienced artist can draw the sea, accurately convey the color and power of the water element. An artist who paints the sea is called a marine painter and draws various types and conditions of the sea and learns this all his life. The pictures of the sea painted with paints, gouache or watercolor, and preferably with oil, very accurately convey the whole gamut of shades and the depth of the color of the sea. The sunset on the sea looks especially beautiful in colors. But let's start step by step draw the sea with a simple pencil.
Drawing the sea is not easy, especially with a simple pencil. It is difficult to convey sea waves and surf with a simple pencil. With a pencil, this can only be done through the technique of strokes. You will need to constantly rub the strokes with your finger or a hard eraser.
1. First, select the main contours of the sea

First, select the horizon and the main contours of the coastline of our composition. On the shore, immediately draw the contours of coastal stones. Then we will separate the horizon line of the sea and draw a line of the beach and draw the sun. You can also draw the contours of small waves around the stones.
2. "Scatter" the sea waves in the picture

Now we need to draw the initial contours of the waves throughout the space allotted for the sea in our drawing. Make strokes with a pencil all over the surface of the sea, but you should not make too many of them, otherwise the waves will not turn out large.
3. Shade the water surface with strokes of a soft pencil

At this stage, we need to draw and shade with strokes the contours of the waves near the stones. To soften pencil marks, you can rub them with your finger or a hard eraser. The shaded part of the sea can also be rubbed with a piece of paper or a finger.
4. Sand on the coastline

Now we will pay attention to the coastline of the sea. In our picture there is a sandy beach by the sea, but you can draw another one. Just like the surface of the sea, sand should be shaded with pencil strokes, slightly rubbed. If necessary, you can remove excessive blackness in some areas of the sea, again with the help of an eraser. After that, you can "color" the stones, strongly shading them, and draw small clouds.
5. How to draw the sea. Clouds

At this stage, we will not draw the sea, but what is above it - the sky and clouds. If necessary, in some areas of the sea, you can slightly wipe the strokes with an eraser vertically, this will give the sea additional highlights. But first, add a few small free-form clouds with weak strokes to emphasize the movement of air. Draw the sun, such a "trifle" always makes any drawing more attractive and realistic.
6. Drawing the sea on a graphics tablet

Now you know how draw the sea with a simple pencil and you can try to make another drawing and paint it with paints, as in this color picture of the sea, made by me especially for this lesson on a graphics tablet.
Video how to draw the sea.
Of course, the drawing of the sea will look much more beautiful if you can draw a sailboat in the distance. In this lesson, you will learn how to draw both the sea and a sailing frigate.
Wandering the seas on sailboats, the pirates made caches of stolen treasures, many of which have never been found. Perhaps these treasures never existed. But not only to indicate the location of an island with treasures in the sea, maps were used by pirates, they were used primarily for navigation.
If you decide to draw a picturesque seascape, draw dolphins. These sea animals are sure to turn out beautiful if you draw them in stages. Draw the contours of the sea and dolphins with a simple pencil, and then paint the entire drawing with paints.
The turtle lives in the sea and is probably the most ancient inhabitant of the seas. For all the years of evolution, turtles only learned to go on land to lay their eggs, but they did not leave the sea forever, like other animals. In this lesson we will try to draw a turtle by the sea on our own.
A mermaid is half a fish, half a person, so you need to draw a mermaid not only a tail, but also fish scales on it. A prerequisite for a picture of a mermaid should be the presence of a reservoir, because they live in a river or on the sea.
The question "How to draw the sea?" not only artists are asked. Almost everyone who admires sea views wants to somehow capture this gift of nature, which just asks for canvas. Or at least the camera lens.
A little help. Landscape in art is a genre in which nature is depicted. Landscapes are also called individual paintings of this genre. The landscape can be urban - here nature has already been transformed by man to suit his needs, or, for example, rural. If the sea is depicted, then such a landscape is called a marina. And artists, respectively - marine painters.
So let me give you some helpful tips. In this article, our main task is to include observation, as well as consider some of the laws of composition and color solutions.
1. Horizon
Do you know where the horizon is? Do not read the answer right away, think, try to answer intuitively. Far away, where the sky turns into the sea? Or where does the earth end? Here and no. The horizon is always at the level of our eyes. You can check today on the street, especially if you are outside the city, where the horizon is clearly visible. Squat down, stand up - the horizon will move with you.
Where should it be placed on the sheet? in the middle? Not worth it. The answer to this question has long been found by artists. You need to decide what is more important (more beautiful, more interesting) - the sky or the sea? If the sea, then a greater place for him, and if the sky, then the sky. It is better to solve the horizon issue according to the so-called "rule of thirds", try it, you will not be mistaken. Divide the sheet into 3 parts vertically, draw two lines. If you are more interested in the sea, it will occupy 2 parts, if the sky is it. A perfect example: the third part is given to the sky, the third to the sea, the third to the beach (sand):

And here is more of the sea:

Of course, the sky can also prevail, especially this:

2. What is darker?
Before drawing a seascape, it is important for an artist to decide the question - which is darker, the sea or the sky? And stick to that contrast. Both the sea and the sky have blue shades, so the question is very important. And they solve it, as a rule, towards the dark sea.

3. sky drawing
The sky is quite easy to draw - look at the sky carefully and you will understand everything. It is usually dark blue at the top, and gradually brightens towards the horizon. As in the photo above. Therefore, we simply add gradually lightness to the sky, from top to bottom it is sometimes almost white.
4. Clouds
They are usually depicted as white. First, juicy strokes of white paint are usually made without water and solvent. Then, downwards, they can be smoothly rubbed into the sky with a very dry brush (another one) or the bottom of the clouds can be made light purple-gray. All transitions are smooth.

5. Sea
The sea is also drawn from dark to light. Near the horizon, it is dark blue, which creates an excellent contrast with the sky, and the depth of space. You can just take blue paint without mixing it with anything. Then, closer to the third part of the sea, we add a little emerald green and white to the blue, more and more brightening and “greening” the water to the shore.

6. Sand.
Sometimes they don’t draw it, but if there is a desire ... For sand, it is better to mix light ocher with a small amount of red and white. And make the transition from sea to sand smooth. This can be achieved by putting strokes of “marine” and “sand” colors next to each other, gradually “mixing” one color into another.

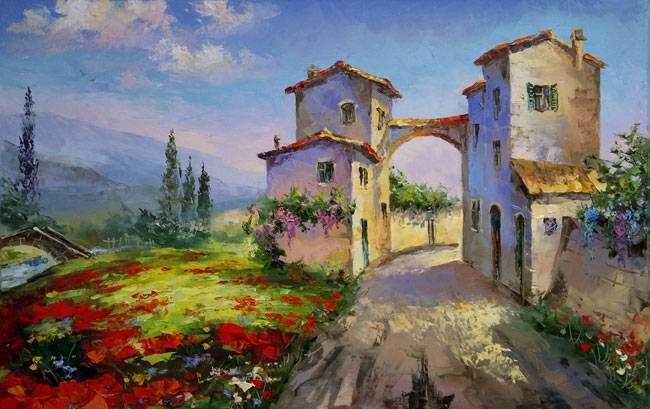
We invite you to paint as many as 4 sunny sea paintings on the course
ITALIAN LANDSCAPE
Meeting frequency: once a week
Level of training of participants: from zero and above.
Broadcast time: 20:00 Moscow time, recording is provided the next day to all participants
Feedback: given by the teacher on all your work during the course and 2 weeks after its completion


Cost of participation
Four online lessons + lesson recordings + feedback during the course
5500 rubles
>>Checkout
It is expensive?
Let's see. The cost of a full-time painting lesson in Moscow is from 1,500 rubles. Add to this the time and money that will be spent on the road. As well as the need to go somewhere in the evening after work or negotiate with grandmothers, a husband or a nanny to look after the children.
Another thing is to pour yourself a cup of tea, entertain loved ones with something interesting or arrange it next to brushes and paints, and DRAW. Online lessons help you do what you want, when it suits you. So much nicer, right?


