Winter is one of the most inspiring times of the year.
Your child loves to draw but has unfortunately run out of ideas? No problem.
We offer all kinds of options for winter drawings for children, we will share the best techniques for translating them into reality.
This creative process captures not only children, but also adults and will forever remain in the memory of a pleasant memory!
Different options for expressing talents

Winter theme - a field for a flight of fancy. You can draw a house in the snow, various fantasies about this (snowman, snow queen, Santa Claus), children's fun, snowdrifts, animals associated with this season, landscapes (day and night), a river or lake with ice on the surface.
There are many materials for this business: pencils, paints, felt-tip pens, helium pens, cotton wool, glue, sparkles.
House in the snow
We present variations of children's drawings on the theme "Winter" with colored pencils and paints. One of them:

To begin, draw three large snowdrifts, one after the other. Draw Christmas trees on them. To do this, draw one stick with a brown pencil. Branches will emanate from it. Draw needles on them in green. Draw snow with a white pencil. A house will hide behind the snowdrifts. Draw a square and a triangle on top of it. This is a wall with a roof. Place a small square on the wall and a rectangle next to it: a window with a door. Sprinkle the roof with snow in white or blue. Ready.
It is better to do the drawing with hatching, and not paint over all the empty spaces.
Draw winter with paints:

Here is the first snow, and a house in winter. But painting is hard work. To get started, mark up with a simple pencil (take the work plan from the first option). Then just paint with gouache. Mark the snow flakes in blue.
Winter landscape
Zimushka-winter:

Divide a sheet of paper in half. Place two Christmas trees on the top line, followed by light green birch trees. Distribute as many trees on the sides as you see fit. There should be snowdrifts in the center. To do this, leave a couple of lines of purple-pink, blend blue somewhere.
winter tree:

We'll have to divide the horizon again. Only now on one-third and two-thirds of the sheet. In the upper right corner we draw the sun. On the horizon line - Christmas trees. We will make them blurry, do not draw the outline and details. With a thin brush on the lower part we draw two semicircles. These are snowdrifts. On them, with the same thin brush, we draw two birch trees without foliage.
Desired fairy tale
When we hear the phrase "winter's tale", Most people think of a snowman, a snow maiden, talking little animals.
Therefore, we offer in the background, and in the front, a smiling snowman and his mouse girlfriend:

To do this, draw three circles. The bottom is the largest, the middle is smaller, and the head is the smallest. She wears a red cap and a multicolored scarf around her neck. On the side are two handles-twigs, on them are warm mittens. In the hand of a New Year's gift.
Fairytale winter house:

Nothing new. We combine elements from early works: here is a house, and Christmas trees, and a snowman. This option is also suitable for children in grades 2 and 3.
fun
The favorite pastime of the kids is, of course, ice skating. Pictures on the theme "Winter fun":

We draw the upper part of the little man the way you always used to do it. Spread your legs a little wider than usual. The second boy can depict how he pushes off the ice. Ice is supposed to be pale blue, otherwise color as desired.
Naughty guys love hockey:

We divide the horizon into two parts. The top one is for the sky, trees and gates, the bottom one is for fun activities. How to make a gate: in a gray square, the strokes go obliquely first from the lower left to the upper right, then from the lower right to the upper left. Put one child on a hill, let the other watch a beautiful picture. Give two children clubs in their hands, throw a black oval puck between them.
We remind you that it is difficult for children to work with paints, because they blur on the sheet. The base should be done with a pencil, and blurry spots should be attached to it, symbolizing hair, clothes, inventory.
fantasies
Children fantasize and dream most often about gifts, the new year and Santa Claus. We suggest you draw winter fantasies using sketches like this:

First, draw an oval, in its center a smaller oval. We divide the large figure into two parts. From above we draw a semi-oval (and on top of it a semicircle), from below a semicircle. We got a hat without a pom-pom. Hurry up and finish it. In the very first oval there will be eyes, furry eyebrows, a nose and a mouth. From the mouth, draw another half of the circle. Starting from the hat, erase the borders, drawing in detail the beard. We paint over.
Another option:

Draw a circle with a smile in the center. This is the nose of Santa Claus. A luxurious mustache should depart from the nose. Then draw frills on the cap and a lush beard in waves. Draw the cap and torso, eyes, eyebrows, gifts behind the back. All that's left to do is paint. Forward! A 4th grade student can do this.
Depicting nature from the earth to the sky
You can draw winter nature in different ways.
Animals
Who, if not a bunny, stays awake all winter. What is not a symbol of this time of year:

The steps are extremely simple: draw an oval, a slightly elongated circle not far from it. Add the contours of the tail and paws. We connect the head with the body, attach long ears to the head. Add strokes to make the wool effect.
Drawing animals with paints is not as difficult as it seems. Penguins live in the ice all year round. They deserve to be on your winter drawing:

How to draw animals: in the upper half, paint an excellent beautiful northern lights. Most of the sheet is occupied by snowdrifts and ice floes. Three penguins walk merrily on them. We make a black oval, tapering a little at the very beginning. Next to him on the sides are flippers. We dip the brush in orange paint, gently apply downwards. These are webbed feet. We make eyes and abdomens in white.
Forest
Forest - trees and animals collected in one place. As in the picture you can depict a winter forest:

How to draw a winter picture with a mountain ash: we draw a trunk of medium thickness, short branches depart from it. At their ends we place small red circles in two rows. The first row is longer. Next to the mountain ash we draw a red semicircle, two sticks depart from it. From these sticks there are three more: two obliquely, one in the center. Add a black head, beak, wings. We place in the picture a couple of Christmas trees and other animals of your choice. Do not forget to use white and blue pencils to create the effect of snow.
Another variant:

First you need to draw spruce. We dip the brush in green paint, then print evenly on both sides of the sheet. It turns out symmetrical needles. We mark the base of the trunk with brown paint. The rest of it was closed by branches. After that, paint over the bottom and top with white, leaving room for the moon. We are waiting for the white paint to dry, then we apply pink next to the yellow circle and blue around the edges.
Night
Fairy night forest:

Even if you work in a minimalist style, there is a chance to achieve the desired recognition. Print the Christmas tree in green as in the paragraph above. On top of this layer, apply almost the same, but white, leaving room for the previous one. It turns out a Christmas tree, which is covered with snow. We add blue paint to the sky, draw stars and snowflakes on it with a thin brush.
river
Hand-drawn picture with a river:

This drawing is also done with hatching. Christmas trees are made with blue strokes obliquely with an inclination to the right. The sky is purple and blue. Let's add yellow-purple clouds. The river is blue-yellow with a horizontal stroke.
Doing crafts: pleasant gatherings
Winter illustration:

For such a simple craft, we need a sheet of cardboard, glue, colored and plain paper, gouache. Cut out a branch from brown paper. We draw snow on it with white gouache. We dip the palm in red paint and print it horizontally to the sheet. It remains to add eyes, beak and legs. Cut out small snowflakes, glue.
Another simple craft:

Materials at hand: cardboard, colored, cotton wool, cotton pads. Glue the disks on top of each other to make a snowman. We cut out all the necessary details for its decor from paper. We glue brown tree trunks and a broom onto the sheet. Further we deal only with cotton wool. Tear off small pieces, fluff them up. It will be snowdrifts. Then roll into large balls - this is the crown of trees. Smaller balls - Christmas tree. The smallest lumps are falling snow.
Works worthy of the competition
We have selected examples of drawings about winter, with which your child will be able to win the competition. The execution techniques have been presented above.


For those over ten
Ten-year-olds are old enough to perform more complex winter drawing techniques. They are already able to work out small details, handle paints so as not to go over the edges.
How to draw pictures on the theme "Winter" for children 10 years and older:


Beauty - do not take your eyes off
Finally, we would like to show you beautiful painted, talented children's portraits of winter:


We wish you success in all your creative endeavors! Let winter be remembered with a wonderful pattern.
Today a winter fairy tale was drawn, namely a house in the forest, on New Year's Eve. Maybe Catholic Christmas has had such an impact, but the spirit of the holiday and something unusual is already in the air - it charges everyone for positive and kind.
Let this drawing lesson help you get inspired and create a postcard, with your own hands, for the holidays!
It will take just nothing, a couple of art materials, namely:
- paints "";
- brushes;
- landscape sheet for drawing;
- simple pencil and eraser.
1. We make a light sketch with a simple pencil - a wooden house made of beams, note where the Christmas tree, lake and background will be. In the course of drawing, you can always make adjustments to the drawing.

2. And immediately proceed to painting with gouache paints. We start from the background, A . We use for this the following colors of paints: black, blue, ultramarine and white.

3. The gouache paint dries quickly enough, and you can move on to the next step, adding a little forest to the background.

4 . We move on to the winter house, arm ourselves with brown paint, ocher (this is light yellow-brown) and black. We cover each bead with yellow-brown paint, and then make the bottom of the logs darker to create volume. We add black color between the logs. And so we gradually paint over the entire main wooden part of the house, leave the windows, shutters and roof without color for now.
Before highlighting the shutters, in shape, look at the 4th figure below in the text, I looked on the Internet for several options for this interesting, almost forgotten detail of a wooden house and chose what I liked. You can repeat or find your own version of the shutters, I am sensitive to details, and therefore such an emphasis on this, you can leave only the window in your drawing and not bother.


5. We actually paint the windows: the lighting in the window is yellow and white, the frames are brown, and for the shutters I chose red and green.

6 . You can also add some snow-covered trees to the background (in the figure below on the right).

7 . It's time to work on the foreground - snow and a frozen lake. The lake itself can be drawn in the same way as the sky, only mirrored - the colors go in reverse order. And if there are snowdrifts around the lake, then they should be additionally highlighted with a shadow - with black paint from below. Please note that the snow is not painted over only with white, it is always several colors: blue, blue, white, purple, and where the light from the windows falls - yellow.

8. And finally, we are preparing green paint for the Christmas tree. If the tree is thinner than the place that was left for it, then we sketch everything in blue.
We draw the Christmas tree in green, in different shades, and on top we add white and grayish-blue, when everything dries, we draw a decoration in free flight, whichever you want and which you like. I added yellow and red balls. And in some places we draw a tree trunk - brown and black.


Winter is a truly magical time of the year. White, crackling snow underfoot, patterns on the windows, warm hats with pom-poms, snowball fights, New Year's holidays - this is not a complete list of all the wonders of the winter season. And if you want to keep a little of this magic for yourself, then learning how to draw a winter landscape is what you need.
 Landscape with mountains and a river |
 Twilight in the forest |
 simple drawing |
Draw a rural winter landscape

Although winter can fill even large cities with the atmosphere of a fairy tale, it is rural views that acquire special charm and comfort at this time of the year. We will demonstrate all the beauty of the snow-covered village houses when we learn how to draw a winter landscape in stages.
First, with a pencil, outline the outlines of one Christmas tree and one house. The Christmas tree will be wide, spreading.

And then - two more houses and another Christmas tree. The houses will have triangular roofs characteristic of many villages.

Let's add more Christmas trees and a palisade. This fence, of course, is rather conditional - in the villages people know each other and do not build high fences.

Now, according to the sketch, we will draw the drawing with paints. The trees will be a juicy green, the houses will give off a warm shade of unpainted wood, and the snow will be a little blue. To make the picture look alive, we will seat three birds on the fence.
That's it, the drawing is finished.
Hills and snowfall - draw a winter landscape

Let's continue the theme of rural beauties. This time we will depict the very outskirts of the village - a forest will be visible in the background. And the snowfall will be in full swing. Don't worry, it's not difficult at all - this example is great for practicing and painting a winter landscape for beginners.
First, let's outline the largest forms - in our case, these are hills.

Then we will depict three spruces in the foreground, and in the background we will make a house, a snowman and the sharp tops of smaller trees. Do not forget about the path leading to the house.

Let's fine-tune all the contours. We will also “give” a snowman and a top hat and depict snowflakes falling from the sky.

Let's color the drawing. Our landscape will be at night, so we will make the sky dark, grayish (after all, it will be covered with clouds). And, of course, you can not do without a gorgeous full moon. The house will be made in warm colors: the walls will be yellow, the roof will be red, and the doors will be brown.
This concludes - we did a great job.
Magic winter night

Despite the fact that untouched snow even during the day, the smoke from the chimneys of rural houses and the pointed tops of the Christmas trees look fabulous, the true magic lies in winter nights. This is exactly what we will show when we figure out how to paint a winter landscape with gouache.
We will not immediately take up gouache - first you need to make a pencil sketch. Let's start with the general outlines of a hilly area, a house and three trees near it.

Then we will draw another smaller house, a path leading to it and add more trees, coniferous and deciduous. In the very foreground there will be a birch with thin branches lowered down.

After that, we will start working with paints. First of all, with dark tones, we will depict the sky and the forest in the background. You can also grab three spruces near the big house. Do not forget to make a month in the sky - for now it will be very thin, young.

Now foreground. We will make the snow a little bluish, the trees green, and the walls of the houses light brown.

Small details remained - the light in the windows, smoke pouring from the chimneys, snow on the paws of the Christmas trees, the trunk and branches of a birch. And many stars in the night sky.
Now we can safely say - the drawing is over.
Winter landscape with mountains and river
Winter in the mountains is amazing. The forest, which has become harsh and dark, clean rivers, thick snow - all this looks so pristine, clean, untouched that you can admire this beauty for hours. But you also need to add a touch of comfort - a small, but solid and neat village house is perfect for this purpose. So we will learn how to draw a beautiful winter landscape.
First, let's deal with the first plan - there will be two trees with thin branches.


On the right side of the picture, we will depict a house of a peculiar shape and the tops of the Christmas trees in the background.

And now you can take up pencils or paints. In the background we will make mountains - they will be completely covered with snow. The house will be made of wood, and the bridge will be made of bricks. You also need to draw transverse stripes on nearby trees - these are birches. Pay special attention to the windows - they should glow, because this is a sure sign that someone lives there.
That's it, we've finished the picture.
Twilight in the winter forest
In addition to night, the most interesting time of day in the winter forest is twilight. The stunning shade of the sky and falling asleep nature merge into a marvelous ensemble. Using the example of such a miracle, we will learn how to paint a winter landscape with paints.
First, let's deal with the sky and the general tone of the snow. To do this, we will use watercolor or gouache to get beautiful stains. You need to wet the paper, and then apply paint with plenty of water and tilt the sheet. The paint will flow down, forming these beautiful patterns:

Then we will depict a tree in the foreground. try to make the branches thin enough. Moreover, the brush must be drawn from the base of the branch to its tip.

By the same principle, draw three small bushes.

Then - two Christmas trees. They should be drawn with thick, saturated strokes of a dark green hue.

We sprinkle trees and bushes with snow. And we will also decorate the front bush with juicy red berries.
Now the picture is complete.
Multi-colored house, bunny and snowflakes - fun winter
Winter is the time for fairy tales, which is why it is often depicted in cartoons. In this section, we will also begin to work in a cartoon manner - at the same time we will learn how to draw a winter landscape with a pencil.
First, we outline the house and the bunny looking out the window. All outlines will be very smooth, rounded, without sharp edges.

Then we will finish the Christmas trees (they will be just as smooth and rounded) and the snow falling from the sky.

Now let's paint everything in the brightest colors. But the snow, of course, must be made blue. And the trees are green.
Everything, a cheerful house is ready.
All children and even adults love winter. This time of the year envelops everyone with its fabulous atmosphere. The winter landscape is mesmerizing: trees silvered with snow and hoarfrost, falling soft snow. What could be more beautiful? How to draw winter and transfer this fabulous mood to paper without any problems? This can be done by both an experienced and a novice artist.
Thinking through every step
How to draw winter in stages, namely a winter landscape with paints and a pencil, we will consider in our article. Let's start with the gouache painting.
Before drawing winter with paints, we make a piece of paper on a piece of paper. We arrange the house, trees and courtyard buildings so as to fill the drawing.
We draw the background. It will be more convenient if we start work from the background, gradually moving to the foreground. The implementation of such a rule is not at all a prerequisite. Some artists, on the contrary, find it more convenient to draw from the foreground, gradually moving to distant objects and the background. Our future landscape will be flooded with sunlight, therefore, in order to add brightness and fabulousness to the drawing, we draw the background in warm colors.

Drawing elements
On the left side, we make sketches of a thick one. To do this, mix three colors of paint on the palette: yellow, blue and a little black.
The main element in the figure will be a wooden house. To achieve the most natural color for drawing logs, you also need to mix three colors on the palette: yellow, brown and ocher. We use a bristle brush, with which we make strokes along the entire length of the logs, painting them unevenly for a more natural look of the tree.
After applying the base color, you do not need to wait until the paint dries, but you should immediately start applying the shadow from the underside of the logs. In order for the transitions not to be conspicuous and not too sharp, it is advisable to mix black paint with ocher.
Draw a distant forest
We add white and yellow to the paint that we used to draw the background, so that the forest seems a little lighter than the background itself.
So gradually we got to To achieve greater naturalness and color similarity, we draw tree trunks by mixing brown, green and black paints. We apply strokes in several layers, without waiting for the previous layer to dry.
By the same principle, we draw the trunks of all trees. After the paint dries, be sure to lighten some areas on the bark, making white highlights from the bright sun. And the shadow side (the back wall of the house) is painted over with a red-brown color.

With thin strokes
While the paint is not completely dry, with a thin brush you can mark the texture of the logs and paint over the window frames with yellow paint. Although the drawing is sunny and bright, the time on it is already in the afternoon, when the sun is gradually setting. It seems that it is still light outside, but the light has already been turned on in the house. Glare in the window can be painted with white gouache, and closer to the frame we darken the glass a little.
Let's go to the details
We take a bristle brush and use dotted movements to draw dark bushes around a wooden house. By the same principle, we add white bushes covered with snow.
From a white hillock in gray-blue color we outline a ski track. We lighten the lower part of each strip with white paint, and darken the upper edge.
The next step will be drawing thin branches on the trees. To do this, we take the thinnest brush and with white paint draw snow-covered branches.
We will decorate the foreground of the picture with a small spruce. The picture shows that the sun is shining in our direction, so the spruce is facing us with a shady side. We mix blue, black, green, white and a little yellow paint and paint over the thick branches of the spruce. Do not forget to show the shadow under the tree. With black and green paint we mark places in the snow where spruce branches look out.
In order to outline light highlights on the Christmas tree, we draw them with white and blue gouache.
And the last step
The last step in the step-by-step course "How to draw a winter landscape" will be the creation of an imitation of snowfall. To do this, we need a hard large brush and white paint. We spray the drawing with paint with a brush, the main thing is not to overdo it, so as not to create a blizzard instead of a light snowfall.

Street in the village in pencil
Now let's look at how to draw winter with pencils. This lesson is not intended for beginners, but artists with a little experience can master it. Let's try to draw a street in the village in winter, covered with snow. The lesson will explain how to draw winter in stages with a pencil.
Execution steps
First of all, we outline the location of the house, trees. This is done with light movements.
Let's move on to shading the sky. It is better to do this with a hard pencil.
Gradually we move on to drawing the house, the fence around it and the trees. We make out the trees that are in the foreground in more detail, draw the bark and branches.
The places where there are snowdrifts with snow are not shaded with a pencil, but left empty.
In the picture, the light falls on the right, so do not forget to add shadows and decorate the walls of the house correctly. Where the sun falls, it is lighter, and on the shady side (side wall) it is darker. To enhance the brightness of the picture, use softer pencils. In place of branches covered with snow, while leaving clean places.
Details
We turn to a more detailed drawing and add small branches. Near the house we draw a pole with power lines, paint over it well and do not forget about the shadow. On the right side we depict another pillar and behind it in the background additional buildings, as in any rural yard.
We draw the tree in the foreground more clearly and place snow caps on it. With a hard pencil, paint over the additional buildings in the background. Don't forget to place piles of snow on the trees. You can practice a little and learn in the winter.

Finishing touches
After all, the picture has already become quite clear. Now it remains to add the finishing touches. We break snow caps on trees with thin branches. Lightly paint over the snow lying on the road, leaving only small illuminated segments, glare.
Lesson "How to draw winter with a pencil" came to an end. In the cold season, most often adults and children spend their leisure time at home. There is a lot of free time left to draw with your children. You can try to make some drawings on the winter theme.
Volumetric snow paint
For this technique, mix PVA glue and shaving foam in equal amounts. With this paint you can draw airy snow, a three-dimensional snowman, a beautiful winter landscape. To begin with, we outline the contours of the future drawing with a pencil, and after that we apply paint. Such a painting can be decorated with sparkles before it hardens. The drawing is ready.

Falling snow
If the house is littered with the remains of bubble wrap, which is wrapped in stores when selling equipment, it can be used for children's drawings. We apply white and blue paints to the bubbles and apply it to the finished landscape. The resulting dots are very much like falling snow.
Unusual paint
How to draw winter using the usual Winter landscape, salt will add fabulous beauty. It is sprinkled with a drawing that has not yet dried, and when it dries, they simply shake off the remaining salt. The drawing is ready. You can admire the sparkling snowflakes that were formed from salt particles.
How severe are the winters in our country! It will be possible to make pedestrian crossings under the snow, and cars will need to be equipped with special systems so that they can fly over huge snowdrifts. Despite this, winter with its beauty pleases many people, causing them to desire to reflect this beauty on paper. How to draw this season?
Winter brings people a lot of holidays, fun and good mood. Festive accompaniment of Santa Claus and his Snow Maiden can bring smiles to people. Snowball fights, sledding, snowman making – what else can unite people of different ages and statuses in the best way. So, we are trying to display on paper one of the beautiful winter landscapes.
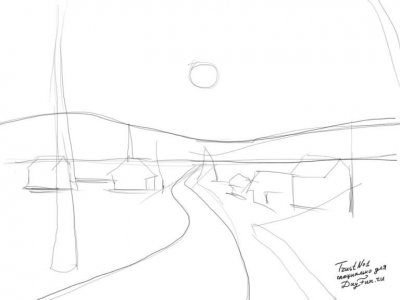
Step 1. We draw a path, long, which goes far beyond the horizon. We draw a line of mountains and from above a small, barely noticeable moon. We do everything so far with thin draft lines, we will give them an image a little later.

Step 2 We draw a compact winter town. We depict several houses with sharp roofs, trees, and most importantly, a festive tree, which is the center of the celebration.
Step 3 On the right side of the picture we place a small snowman. Add hatching to tree trunks and mountains.

Step 4 Now the picture lacks liveliness. A small fence, paths should be placed near the houses, the houses should be carefully shaded.


