I didn’t even think that the portrait mode would be so cool. It truly transforms ordinary phone photos. Pictures immediately become livelier, more atmospheric and emotional.
And the coolest thing is you don't have to. none extra action, no post-processing, no blur with fingers. You just point the camera, and then it does everything by itself: it creates 9 layers of depth, detects the edges of objects and displays real-time previews.
Studio photography
I'll start with an already familiar photo - you really liked it in the material. This is a near-perfect example of the iPhone 7 Plus' portrait mode in good studio lighting.


In this case, the camera does not make too much noise, it works very fast and instantly separates any objects from the background. The only negative is that the phone gets very hot if you take a lot of photos in a row under bright spotlights.
street photography

Good light is the key to a good shot in portrait mode. As you remember, the second camera 7 Plus is weak: the aperture ratio of only f/2.6. She needs a lot of light so as not to overwhelm the picture. Problems begin as soon as the sun hides behind the horizon.
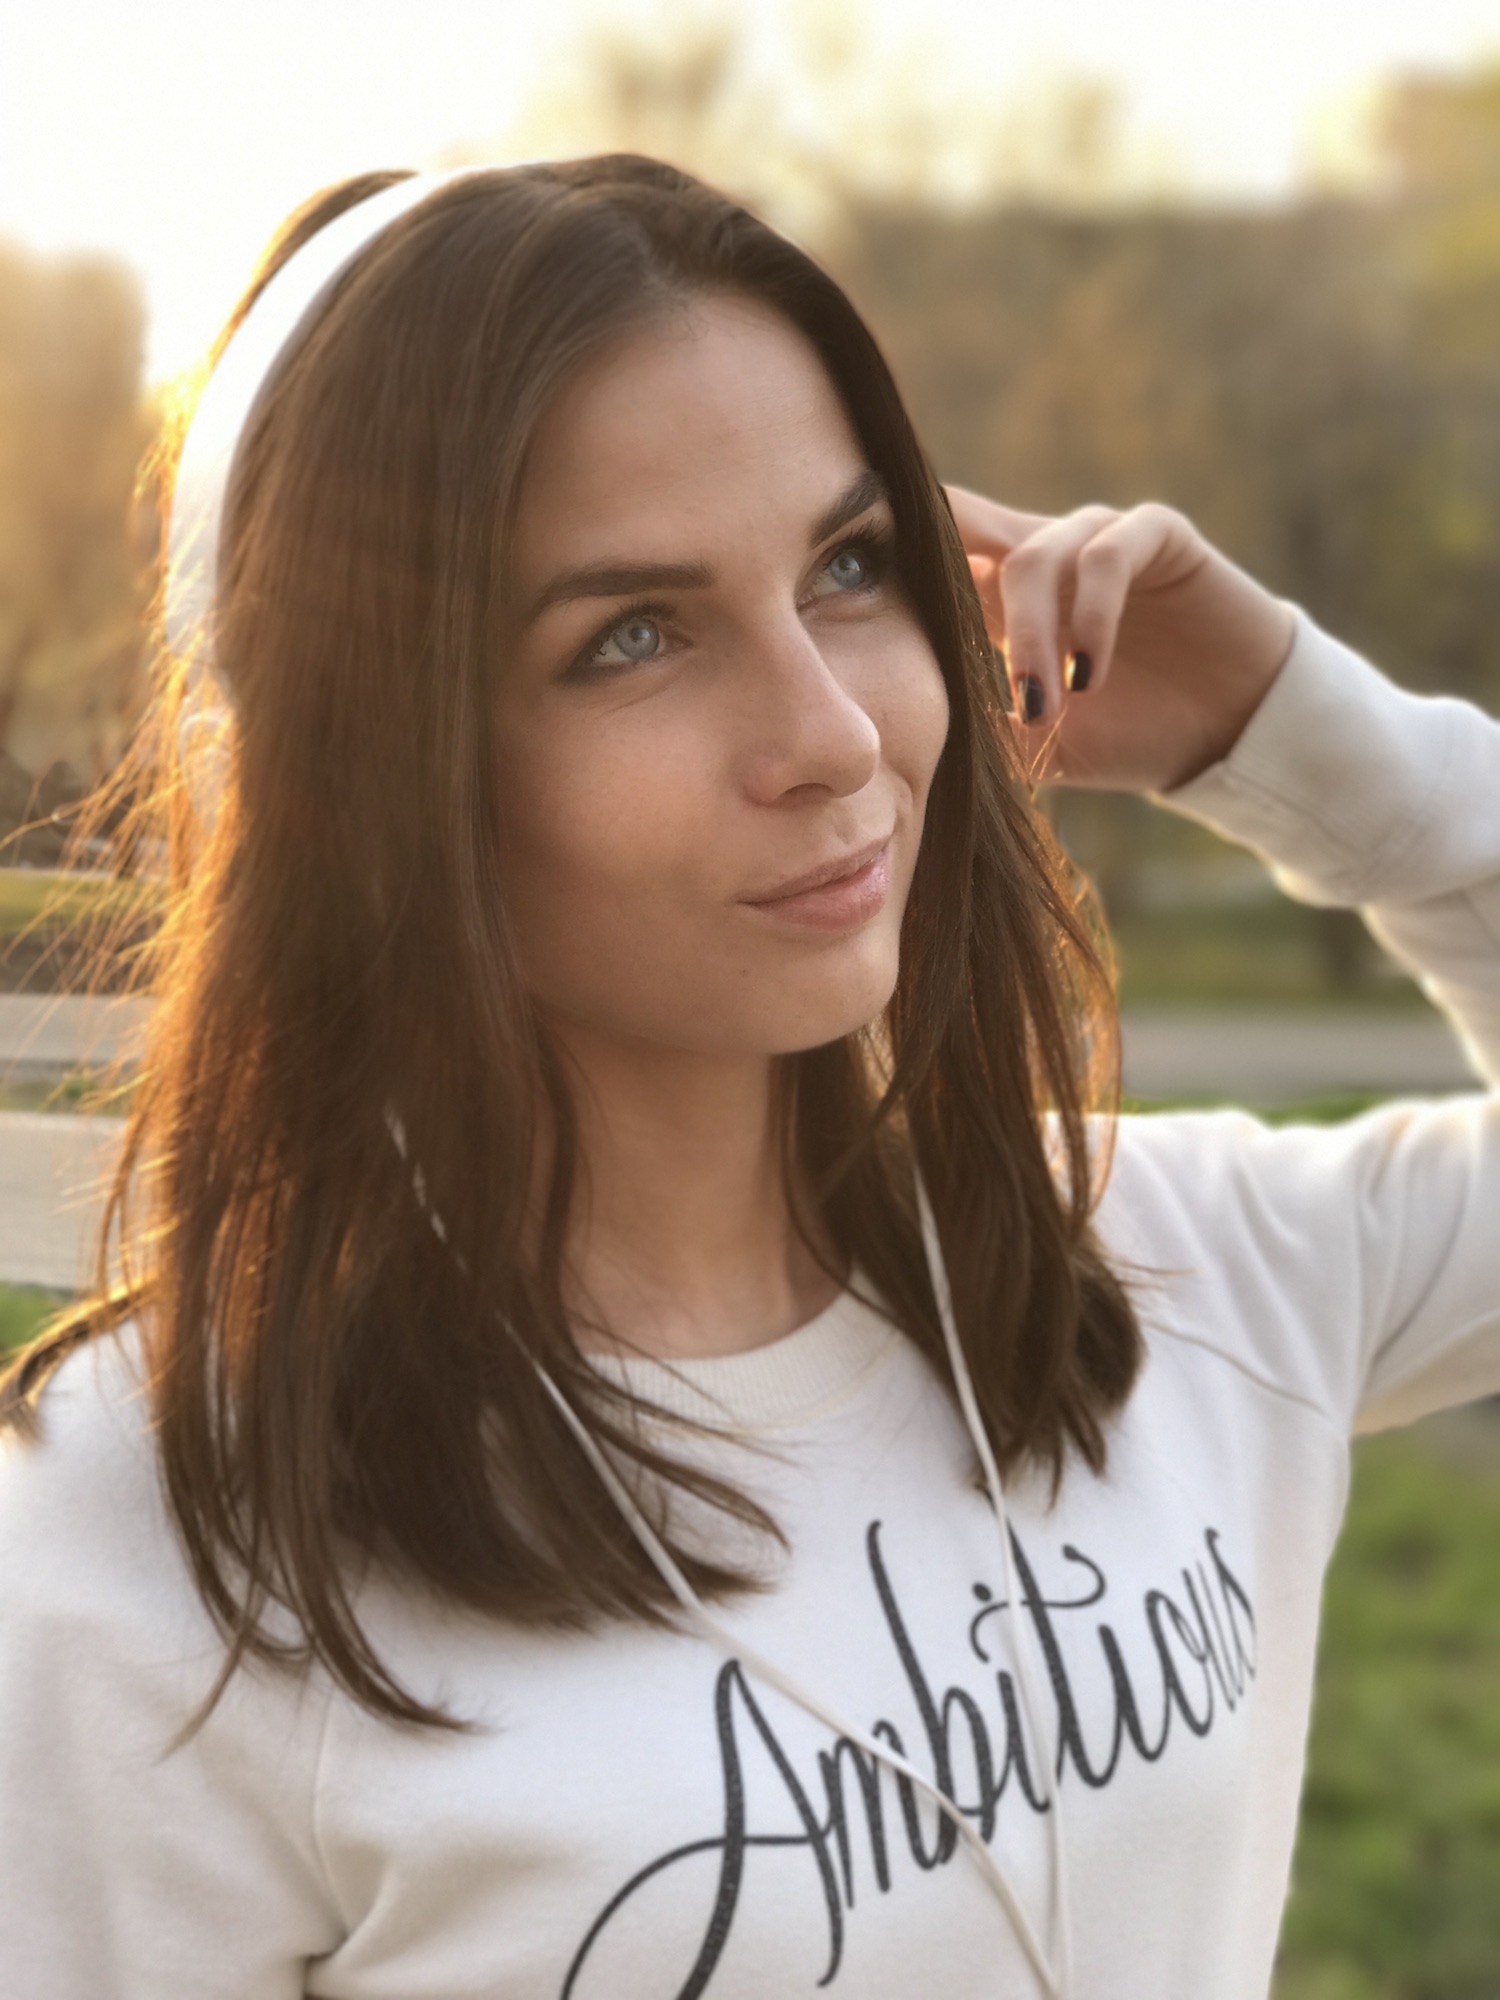
It took quite a few tries to capture this sunset photo, with the iPhone 7 Plus constantly misfocusing and blurring in the wrong place. Many shots were noisy and not sharp. As a result, out of ten such photographs, no more than five were successful.

Sometimes the lack of light plays into the hands of the camera, so even in the shade you can get an interesting shot. But it's definitely not worth shooting on a dark evening. The background will be smooth, and the object will be covered in noise.
Shooting indoors

Indoors, sometimes another problem pops up. If there is too much light (for example, a person is sitting in front of a window), then the portrait camera starts to overexpose the picture. Even manual exposure adjustment does not always save.

With more subdued lighting, pictures are better. The camera works more stable, does not try to raise the exposure and catches objects more quickly.
Not only portraits

The iPhone 7 Plus portrait camera performs well not only with people and animals, but also with flowers, various objects and even food. This once again proves it versatility and utility in everyday life.
Go beyond portraits: shoot full-length children, flowers, burgers, whatever. Don't be afraid to experiment. The chance that the camera will pleasantly surprise you exactly when you do not expect is huge.


iPhone 7 Plus Portrait Camera - not an empty sound. Of course she has her problems. In poor lighting conditions, the second camera is completely useless, and algorithms still do not always accurately process the edges of objects.
In iOS 11, the company has already promised to improve low-light processing, improve image quality, and optimize optical stabilization for portrait mode. At the moment, in the case of the first beta version, no changes have been found - evening photos are still noisy.

I hope that in the next iPhone the company will be able to supply no less aperture optics than the main lens, will not save on the sensor and will bring the software processing to mind. Not in vain on
One of the interesting improvements in the recent release of iOS 10.1 is the ability to use the depth-of-field (background blur) mode to take portraits on the new iPhone 7 Plus. Portrait Mode is a feature exclusive to the iPhone 7 Plus, the only one in the Apple product line to feature 2 rear lenses.
This mode allows you to get the effect of "bokeh". The smartphone analyzes the visual information coming from the cameras, highlights the main object of the foreground in the picture and add blur to the rest of the images. The bokeh effect is instantly visible to the user (Live Preview).
There are already other brands of smartphones that have tried to reproduce this effect with various technical tricks. The capabilities of the second camera are mainly used, and the depth of field of the surrounding space is determined. But to get a real "bokeh" effect that is not inferior to professional SLR cameras, you need a powerful wide-angle camera. Sophisticated digital technology, augmented by the iPhone 7 Plus's Smart Learning System, has made it possible for the first time to achieve full bokeh for smartphone users.
bokeh effect
Bokeh or bo-ke (bokeh, bokeh) is a photographic image processing effect developed in Japan. The word is Japanese, meaning "blur" and fuzziness of the image in the picture. In the terminology of photographers, bokeh is a description of the properties of an image in an area of lack of sharpness. The more petals a shutter diaphragm has, the more round it will be. And the more interesting the nature of the bokeh effect becomes. True, according to professionals, zoom optics give a less beautiful bokeh effect than cameras with lenses with permanently fixed lenses. But in general, it is believed that the more expensive the optical component of the camera, the more stylish and beautiful bokeh we will have at the output.
Bokeh visually sets off the main subject of the image in the photo. The first tests of the iPhone 7 Plus portrait mode after updating the firmware to iOS 10.1 make it possible to list the following features of this function.
- The mode requires that the area be sufficiently well lit, otherwise the shutter refuses to work.
- The function is only valid for taking still pictures. It won't work for creating a video.
- You can only take pictures from a distance of two, two and a half meters, no less.
- The mode allows you to photograph people and objects, although the latter is not officially announced.
- You can apply a timer for three and ten seconds.
How to turn on Portrait mode on iPhone 7 Plus
- The firmware needs to be updated to version 10.1.
- Launch the Camera app.
- Select the Portrait mode in the application settings (scroll the wheel).
- Tap on the "Try Beta" setting.
How to take photos of people with bokeh on iPhone 7 Plus
- Make sure the subject is at least 2 meters away from you. The smartphone itself will be able to detect the body and face of a person and carry out identification.
- Look at the hints that the application gives out. The camera reports that there is insufficient lighting in the room, that the distance is less than 2.5 meters, etc.
- Camera setup is automatic. At the end of the screen, the inscription “Depth effect” appears at the bottom of the screen.
Now shoot!

How to Photograph Objects and Animals with Background Blur Effect on iPhone 7 Plus
This feature is not officially supported. But in the manual mode of adjusting the portrait effect, you can change the depth of field and get quite good pictures.
- Make sure your subject is at least 2.5 meters away from you.
- Select the main subject of the photo, for this, tap once on the screen in the center, you will be shown the focus point.
- Select the main object.
- Pay attention to the hints given by the application. The camera itself will report that there is insufficient lighting in the room, that the distance is less than 2.5 meters, etc.
- The setting of the background depth of field function is automatic. After it ends, the inscription “Depth Effect” appears at the bottom of the screen.
Plus has an amazing camera, perhaps the best available on smartphones. The biggest draw is the new portrait mode, which mimics the quality of photos taken on a DSLR through the use of some hardware and software tricks. This mode adds a depth-of-field effect that blurs the background while keeping the main subject in focus. You will often see this quality in photographs taken with a digital SLR camera.
For the most part, Portrait Mode works admirably well, though not always flawlessly, and sometimes with less than perfect results. In fact, Apple does not hide the fact that this feature is still in beta. In order to minimize the chance of disappointment with your photos, below are our top tips for using portrait mode.
Keep a normal copy 
Since Portrait mode is still in beta, Apple includes a default setting that allows you to save an extra copy of a photo without the depth of field effect. This can be annoying, and yes, this copy takes up extra space, but it's always better to have an extra backup of a snapshot than nothing if you're unsure about the quality of future snapshots. So, if you end up with an image with an unacceptably bad background blur effect, you will always have the original image without this effect.
If you have already turned off this feature, then you can always return this feature in the settings. Just click on the Photos & Camera section, and then look for the Portrait Mode section at the bottom of the panel. Turn on the "Keep a normal copy" option.
Try to shoot the subject away from windows and mirrors
I'm not sure about the cause of this phenomenon and I'm mostly based on personal experience, but it's better to shoot without mirrors and windows in the background of your shots. I believe that for some reason, Portrait mode is more likely to make mistakes with depth of field settings in the background of mirrors and windows. The reflection from the mirror and the transparency of the window often give the wrong degree of blur effect, which is detrimental to the final result.
A great example is when I needed a picture of the best iPhone mount in a car for my article. Due to the light passing through the windshield in the background, it was extremely difficult for the smartphone to focus on the subject itself. The iPhone 7 Plus often produced incorrectly blurred edges of the main subject, or even blurred most of the subject itself. It took several attempts to get acceptable good results for this article.
This is more likely a software issue than anything else, so I'm sure Apple will fix this bug over time.
Keep track of your lighting levels

The iPhone 7 Plus has a fantastic camera designed for shooting in low light conditions - that is, when you are not shooting in portrait mode. As you know, we are actually dealing with two cameras: one with a wide-angle lens and the other with a telephoto lens. The wide-angle lens has a gorgeous f/1.8 aperture that lets in a lot of light well. At the same time, the telephoto lens has a maximum aperture of F/2.8, which doesn't work as well in low light. Since both lenses are used in Portrait mode, telephoto results tend to be dim and noisy.
In addition, in low light conditions, the software has difficulty determining which object should be in focus and which should not be in focus. This situation eventually results in the photo having either too much or too little blur effect. The Camera app has the ability to warn you ahead of time when there's not enough light to get a good photo with enough depth, but sometimes you'll have to be on your own too.
Try to take close-ups of objects and people only. 
Since Portrait mode is still in beta, you should try to use simplified shot plans for best results. Shooting plans should be limited to two categories: shoot only large objects and close-ups of people's faces. This mode has difficulty focusing properly on small subjects or subjects with blurred borders.
I tried to take a photo with my iPhone 7 Plus hybrid tripod JOBY Gorilla Pod Hybrid and got absolutely zero result. Due to the odd, twisty tripod legs, Portrait mode was unable to figure out what should be in focus and what should be subjected to a background blur effect. Try to take close-up pictures only.
As the name suggests, Portrait mode is best suited for taking portraits of people. Sometimes there are problems with drawing the contour of the hairstyle, but in most cases, in relation to people, this mode is the best choice for shooting such a plan.
Turn on camera grid 
This tip should be recommended for any type of shooting, not just portrait mode, but I think this option plays the most role in this mode. The enabled camera grid option in the settings will give you the most help in the correct construction of the frame and in the correct placement of objects in the frame. This tip is definitely more useful in portrait photography, when you're trying to get a very high quality photo, as opposed to a quick and pointless subject shot. If you managed to successfully position the subject across the entire field of the frame, then most likely the result can be sent to print.
To turn on the camera grid, go to the "Photos and Camera" settings panel and turn on the "Grid" option.
Fast forward for a second to September 7, 2016, because it was then that such a feature in cameras as the “Bokeh Effect” or, more simply, “Portrait Mode” was laid.
If anyone does not know, thanks to this function, you can take very interesting pictures with a blurred background. It was Apple who started the fashion for such photos that were taken on a mobile phone.
Today we will discuss a question that will be of interest to owners of such devices as the iPhone 6S, iPhone 7 and iPhone 8. Can they take such wonderful photos?
Is there a portrait mode on the iPhone 7 and iPhone 8?
If you are currently holding your beloved iPhone 7 or iPhone 8 in your hands, and are trying to find the Portrait mode in the camera, then you simply will not find it there.
Each year, Apple likes to highlight a certain device by giving it a very special feature. I think the reason is clear, because such a process is done with the most expensive devices and this way you can earn more money.
In 2016, that was the iPhone 7 Plus. It was then that for the first time we saw a smartphone that was equipped with a dual camera and two functions became the main explanation for this action: 2x optical zoom and portrait mode.
It's 2018 and this time, two devices have already received the same benefits, only now it's the iPhone 8 Plus and iPhone X (10).
If you read carefully, you probably already understood that there are no hints of the presence of a portrait mode in the iPhone 7, iPhone 8, and even more so the iPhone 6S. It just wasn’t implemented in these smartphones, because it requires a dual camera.
Unless you can do it with the help of different applications and blur the background manually. But as practice shows, this is a long process and the result can hardly be called good (examples: Depth Effects, Patch: Smart Portrait Editor and others).
Why is there no portrait mode on iPhone 7 and 8?
In principle, I have already named the main reasons and a little later I will list them. For now, I want to discuss a little why this feature was not implemented in the iPhone 7 and 8.

As practice shows, it is possible to implement such a function in a conventional camera, and this was proved by such a smartphone as the Pixel 2, which, by the way, tops some ratings in terms of shooting quality among all smartphones.
This proves once again that Apple loves to highlight devices and make them special. In order to buy more of them, so to speak, make more expensive devices desirable and make buyers overpay.
Although again, if Apple is used to blur the second camera, then Google's phone is simply using good software. The same function is just implemented differently.
Well, the main reasons that you will hear everywhere are such moments:
- there is no dual camera and less RAM, which simply does not make it possible to take such photos;
- I want to get more money by highlighting the flagships.
If you have something to add, just write about it in the comments. It will be interesting to read your opinion both to me and to other readers.


