french artist Xavier Collet explains how to make the drawing process more efficient using the example of his work with a dark fairy surrounded by a forest.
I think that following rules drawings can help you develop your skills, but sometimes it can feel like they are trying to limit you. Trying to satisfy a wide range of artistic criteria such as character designs, thoughtful compositions, and effective color schemes can slow you down, but fast work isn't always good, so keep that in mind.
I believe that the best way to the top is to learn to feel, to do things instinctively. With practice, seeing things that are in the image and identifying those elements that still need to be worked on becomes second nature, fills the subconscious as you work.
With practice, it becomes second nature to see things that need improvement.
The only thing I did before I started drawing was to step away from everyone and the pictures in my head so that my subconscious mind would start generating ideas. After that, I completely immersed myself in the drawing process.
Initial sketches
I don't know how far I'm going to take this illustration. But I know that I want the main character to be a kind of queen - someone who will make you afraid, feel anxious, looking into her eyes.
So I'll start with a rough sketch to get an idea of what the composition will be. She walks in the forest and watches you. Well, let's start drawing someone who will make you feel real fear and bewitching horror.

Fifty Shades of Gray
It is important to take into account the depth of the image and determine the planes: a background with two or three levels of depth; your hero's main plane and foreground.
I start in mono - it's faster and it will be easier to change something. I chose a palette of many shades of gray and by adding horns and a full-length long dress to the character, I began to define her character.

A starting point
We all have our little weaknesses. Mine is that I can't resist drawing the character's face in the early stages. It's often said that detailing elements in isolation is not a good practice because you don't end up seeing the big picture.
Useful advice, I do not argue, but I can not stand the fact that there will be only a few details on the face, my hands itch terribly to complete them. So I took some time to draw the face, crown, horns and hair.

Sometimes it is very difficult to determine what colors an illustration will be in. So here's a little tip for you. Take an old drawing or even a photograph, it doesn't matter. Duplicate the image layer and apply the Gaussian Blur effect to the duplicate. Then change Blending Options - Blending Mode - Overlay. And see if this color scheme inspires you for your working illustration.

Finding a Color Theme
After that I adjusted the Hue/Saturation and paint with the brush already in color mode. Another tip is to apply Auto Levels or Auto Contrast and then play around with the layer's blend modes. Sometimes happy accidents will inspire you and help you overcome the wall of "uncreativity".

Add details
I start drawing the details of the character, starting with the head and bust, before moving on to designing the clothes.
I'm not making any ideas about the dress like I said, I'm just scrolling through a large selection of various images so that my creativity gets fresh juices and I can come up with an unusual design for the dress.

Contrast
It is good if there is contrast in the picture. More specifically: the opposition of shapes, brightness and color. My choice for this illustration is a bluish light that will point to magical power and control over all living beings in this figure.

More details
Now that I'm satisfied with my choice of colors, I can complete the design of her costume by adding details such as jewelry, and depicting a range of materials such as fur, leather, metal, glitter, which all together make the design more interesting.

Plastic surgery is your friend
Remember the benefits of digital graphic programs. The Photoshop Liquify filter is a powerful editing option. Here in my illustration I'm using it to touch up the face of the fairy since I decided it was too long.

Finish with her
Time to finish the last details of the character. I added the finishing touches to her corset, painted a skull on her staff, added a blue glow to her costume, and so on.
And now it's time to spice up the background with some rays of light and some noise. The speckled brushes set to Dodge Color are perfect for me.

We create pets
I want my dark fairy to have... pets. The bottom of the composition is a little loose, so it's perfect place to draw creatures that come to life with her dark magic.
I don't have a clear idea of what I'm going to do, so I sketch with a dark brush and then use the brush set to Color Dodge to add details such as the eyes and mouths from which the wisps of magic come out.

Monster menagerie
So far, I'm working instinctively and I'm quite happy with the design of my creature. Now I can add others. I use the same workflow: I create a small sketch and then add details using a brush set to Color Dodge.

blurry elements
I am almost done with this illustration and now I will apply some of the tricks I have learned over the years of my work. I want my fairy to look at the observer - the viewer who is hiding in the forest.
So I paint the branches with hard brush strokes. There is no need to draw them in detail. Then I added a Gaussian Blur effect to them and that's it - they're done!

Grain adds texture
I love adding texture to my drawings. Sometimes it's just a paper texture created with Layer Overlay. But now I'm going to do something completely different.
I added a neutral gray layer (Saturation - 0, Brightness - 50) and applied Filter>Noises>Add Noise twice (set to maximum) and Filter>Blur>Blur three times. Then I set this layer to Overlay (Overlay) and clicked on the Opacity of the layer, setting the settings to 5-6%

More magical life
I decided that the picture needs more life. My solution is to quickly paint the butterflies in the foreground, again to give the drawing more depth.

The last trick
Last tip. An easy way to add a little more variety to your art is to create a new layer and fill it in with a soft cloudy brush.
Set the foreground color to light gray and use a soft cloudy brush to create contrast. Then put this layer in Overlay Mode.
I followed my own advice and finished the drawing!

Thanks to parents, educators, fairy tales become the first books for kids. It will be interesting for the children to learn how to portray the characters of their favorite fairy tale or scene from a magical story.
How to draw an illustration for the fairy tale "Silver Hoof"?
If you need winter fairy tales, then it fits perfectly silver hoof". See how to draw a scene from this interesting history Bazhov.
Draw a house first. Draw two parallel vertical lines that will soon become the corners of the house. At the top, draw two lines that will turn into a roof.

Since the fairy tale "Silver Hoof" is winter, draw a roof and snow on it. Then draw walls, windows. One will be with shutters. Explain to the children why these elements are needed.
To show the presence of snow, draw a wavy line near the bottom of the house.

On the roof of the house there will be a silver hoof goat. First, it must be depicted schematically. To do this, draw three slightly uneven circles. The top one will soon become the head, the second will turn into the front, and the third into the back of the animal. Connect the pieces and then trace around this diagram to define the character more clearly.

Draw the missing details. Erase the guide lines. Remember to depict one of the front hooves so that it is raised. Draw horns, eyes, ears, nose, legs with hooves. Mark several points on the roof of the house. Soon they will turn into gems.

Now you need to draw Christmas trees. After all, the house is in the forest. Draw a few lines to show which fluffy snow. Draw the stars and the moon in the sky.

Here is how to draw the fairy tale "Silver Hoof" with a pencil. If you wish, then color your masterpiece. Draw snowdrifts and snow on fir trees with white, blue, gray paint. Then you will see where the shadow is. Behind one of the snowdrifts, you can draw a girl who is watching such a miracle. Make the house and characters more colorful, and add color to the environment. The painting is complete.
Illustrations for the fairy tale "Kolobok" in stages
Show your child how to draw the characters in this story.

- First you need to draw a circle in the lower left corner. Inside it draw the eyebrows, eyes, mouth and nose. This main character fairy tales "Kolobok".
- On the right, draw a hare, but first - its schematic representation. To do this, draw an oval big size, which will become the body.
- The head is pear-shaped, as it is in profile. Ears, hind legs, tail oval. And the front paw consists of two small ovals, so you can see that it is bent.
- The next step is to remove the extra lines. Then put touches on the hare to show what kind of fur coat he has. In some places, leave lighter spots so that you can see, here the shadow falls less.
- Yellow bun. Color it in this way, make the mouth red, and mark the blush orange. You can draw grass and a landscape of the forest.
- For the next illustration for the fairy tale "Gingerbread Man" you will first need to depict two details. The upper one is pear-shaped with a snub nose, and the lower one is oval.
- Now draw two round ears at the top and four paws below. At the third stage, outline the features of the muzzle, claws, erase the excess. At the end, draw the Bear with a brown pencil, and his tummy and the inside of the ear with yellow.

The next illustration for the fairy tale "Gingerbread Man" is visible in the picture.

Image starts with drawing geometric shapes. This is an oval that will soon become a body. Position it horizontally. A little higher and to the left, draw a slightly elongated circle, which we turn into a muzzle. To do this, draw a sharp nose and two triangular ears.
Then draw the tail and paws. In the third step, designate the breast, tummy, eyes and the tip of the tail. Don't forget to erase the extra lines. Then it remains to paint the fox red, leaving a little white in the area of \u200b\u200bthe chest, abdomen and tip of the tail. And make the bottom of some paws darker.
"Grey neck" - illustrations for the fairy tale
Introduce the children to this story. After all, this story awakens the best feelings, brings up kindness in children. Drawing a duck is not difficult, especially since this skill will certainly come in handy for kids in the future. After all, sometimes they will need to portray this bird.

Drawing step by step is easy. First you need to draw a small circle and a figure that looks like a horizontally located drop. Now add a beak to the head, which is shown to the left. The wing almost repeats the shape of the body. Draw an openwork edge on it, as well as on the tail, to show that these are feathers. Then draw the nostrils, eyes, make the feathers on the chest more corrugated.
In the next step, this will colorize this part so you can see it's a duck gray neck. The breast and wing are the same color. Draw the beak and paws in orange, and the head and body of the bird in light brown.
Illustration for the fairy tale "Goat Dereza"
This skill will also come in handy when you need to draw a mother from a magical story.« Seven goats." As you can see, this character's head is oval and slightly turned down. An elongated triangle with a beveled top emerges from it.
Since the arms are on the chest, at this stage you need to make them oval. On the next one, you will add tassels and outline the sleeves. Draw the bottom and top skirt, apron. Then depict the horns, ears and the base of the headdress. Don't forget to draw the hooves.

How to draw a Little Mermaid - step by step illustrations for a fairy tale
This skill will definitely come in handy when you start reading a fairy tale of the same name to your child. To draw the Little Mermaid, use the presented step-by-step photos.

First draw a rounded head. To then maintain symmetry, drawing facial features, draw a vertical strip, but not completely. In this step draw the neck and body up to the waist. On the next one, using the previously drawn line, draw symmetrical eyes, and below - the nose and mouth. Draw the tail. Then remove the extra lines and make the face more expressive. Draw hair and scales on the tail. Show your child how to color a mermaid to make it look so bright.
How to draw a fairy tale "Golden Key"?
This is also easy to do. Draw a round head, in the place where the shoulder will be located - a small circle. Mark the line of the body. This curve will help to create a back and a leg that is slightly back. Draw the second at a short distance.
Draw the cap of this character. To draw Pinocchio further, depict his eye and ear. Draw hair that looks like shavings. Dress this character in shorts and a jacket. Give him the golden key. It remains to add colors, after which the picture is completed.

The second character in the Golden Key fairy tale is Karabas Barabas. To draw it, first draw a round head, just below is a powerful body. We do not draw the neck, then the figure of Karabas Barabas will seem even more massive.
In the abdomen, draw a semicircular line so that you can see where the shirt ends and the trousers begin.
Draw the arms, legs, then the beard and face of this negative character. It remains to decorate it.

Here's how to draw a fairy tale" Golden Key"
How to draw Santa Claus and the Snow Maiden in stages?
In anticipation new year holidays this skill will be very relevant. After all, children at school will probably be given such a task. They can portray Santa Claus and the Snow Maiden to make a postcard and give it to their parents or friends.

- Let's start with Santa Claus. Draw a narrow triangle that will soon turn into his fur coat.
- At the top, instead of a point, draw a semicircle, which will soon become a face. Draw in the middle of it vertical line to keep facial features symmetrical. From above, draw the edge of the cap and itself. Draw the collar, sleeves, staff and beard.
- To draw Santa Claus further, in the second step, add facial features to him, mittens, make his beard more fluffy. Mark the places where there will be felt boots, a belt.
- In the third drawing, this character becomes more and more realistic. Show that the edge of the fur coat is fluffy. To do this, you need to make the lines in these places more intermittent. Modify the beard in the same way. It remains to paint the robe of Santa Claus, draw pink cheeks for him. Now we move on to the image of his granddaughter.
- To draw the Snow Maiden, first also draw a triangle, but at the top instead of acute angle draw the neck, head and sketch out the hat. Since the face of Santa Claus's granddaughter is turned to the left, move the vertical line here as well, which will help make it more symmetrical.
- Then swipe horizontally to understand where the eyes will be located. Draw the nose and mouth below. Depict the girl's hands and clutch. Make this accessory more fluffy, as well as an edge on a fur coat and hat.
- Draw a hairstyle, facial features. To draw the Snow Maiden further, all that remains is to decorate her. Usually this girl flaunts in a fur coat and a blue hat.

How to draw Baba Yaga?
When a child draws an illustration for a fairy tale, it may be necessary to depict this character as well.

- First, sketch this granny. The circle will become the head, the oval the hunched back. Draw it below long skirt, and draw a hooked nose at the top.
- Grandmother's chin is elongated. This will be seen in the second picture. Draw her hand, slippers, eyes, this will need to be done in the second step.
- On the third draw hair, scarf with strings at the top. Mark where the apron and sleeves are. At the next stage, draw the bottom tooth of Babe Yaga, draw a picture on the slippers, mark the fingers of the hand.
- It remains to decorate this character. You can draw a mortar with a broom, as well as a stick and a wooden plate.
How to draw a knight, a princess - step by step illustrations for a fairy tale
- There are magical stories where these characters appear. To draw a fairy tale with their participation, let's start with the image of a girl.
- Draw her round head, thin neck, body and bell-shaped skirt. To depict facial features, first draw auxiliary lines.
- Draw hands and hair. In the next step, add a pattern to the dress. You can steal it with bows. Make your hair lush and your eyes more expressive.
If a child draws, then he can "dress" the princess at his discretion. After all, girls love to invent outfits.

It remains to depict the crown, the fan and you can begin to draw a knight.
Draw two figures that will become his ammunition. The top rectangle is the helmet. The next picture shows that you need to finish the arm and legs. Gradually add more and more new strokes. Draw protection for the knees and elbows. It remains to decorate this hero and rejoice at how quickly you were able to draw a knight.

Often filmed based on fairy tales cartoons. This also applies to the next hero.
How to draw Winnie the Pooh step by step

Draw an oval. It will repeat the figure of this character. Divide it in half with a horizontal line. At the top draw a semicircle, right below it mark two eyes and a nose. Also draw a characteristic drawing here, with which you will then mark the places around the eyes. Draw ears, paws.
This is how to draw an illustration for this fairy tale in stages with a pencil. You see what needs to be highlighted with a simple pencil, and which areas to leave white.
It's very interesting to do this creative work. You can add other features to the drawings, draw heroes magic stories against the background of the forest, the palace.
See how to draw an illustration for the fairy tale "The Frog Princess".
And if you need to draw the heroes of the fairy tale "Turnip", then watch the second master class.
You will see how I create a concept sketch, a background, and then gradually improve the image, drawing out the details. By the way, you can easily apply the techniques shown in this tutorial to your illustrations, logos, and other projects! Drawing lessons like this always seem to make the drawing process easier, but if you think you're not good enough at drawing, it's never a bad idea to just give it a try, as the goal of these lessons is to improve your skills anyway! I'm sure those of you who can't make scale drawings can start with quick sketches like this one.
I used the following tools:
- Photoshop CS3
- Wacom Graphire 3 USB Tablet (Blue)
Step 1 A: I started with a sketch. Then I painted the surface of the earth. Here, as you can see in the finished drawing, there is a lot of green grass and it reminds me of old song: "Green Green Grass near the house." So try to imagine something like that. Possibly around here little house there is an old oak tree, in the shade of which you loved to play so much as a child. Once I decided on the scene, I began to think about the colors: the main and background shades. Here I tried to imagine a clear image. I started painting on a blank background, to which I added a few colors. I don't like to work with drawings, the background of which is simple and inexpressive. Adding different colors keeps the image interesting and also helps to set the right mood.
Step 2: I added details with a brush with a small diameter. For these illustrations, I only use the brushes that Photoshop already has by default. You can download other brushes if you like. Here are the brushes I used for this illustration. In my drawing, I will use only standard brushes. Before you start painting, you need to set up your brushes.

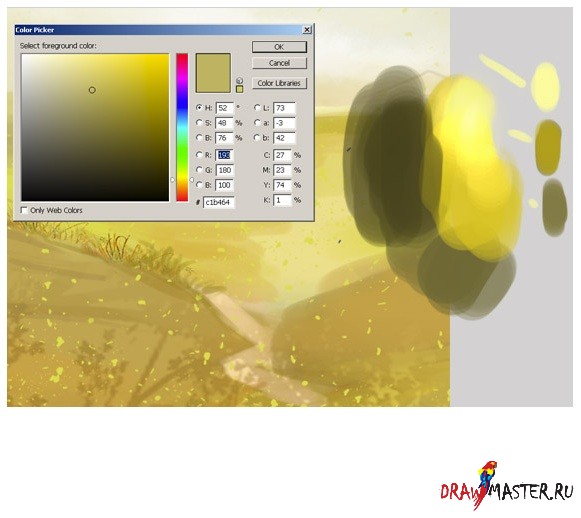
Step 3: Now you need to choose the main colors for your composition. And here are my colors for this illustration. As usual, I want to create a very bright drawing. For the background, I chose yellow and blue shades. All other colors for environment. Open another file and save your colors. And let this new file will always be open while you are drawing.

Click on the image to view the image in full size and 100% quality.
Step 4: I decided to remove old car who was at the house. She really doesn't fit in here. This car is not combined with the rest of the elements of the picture. So I had to erase the car and draw an old oak instead, you might want to draw some other tree. I made a rough sketch in color with a large diameter hard round brush, and then roughly painted the details with the same brush but with a smaller diameter. I also created a new layer for the grass and made a rough sketch.

Step 5 A: Then I proceeded to more detailed drawing green grass with a small hard round brush, and with a soft round brush I smoothed out the image... but later I can change this, for example, there may be reddish-blue or yellow flowers. But on this moment, I think that green grass is just what you need.

Step 6: When I look for a suitable color, I do this:
Step 7: Now pay attention to how I paint the wood. In this tutorial, I do not show many types of wood. Only two types are presented here: one for the door, and the second for the fence.

Step 8: And now let me resize the canvas. As you can see, if you want to get a drawing with a lot of detail, then you will have to work on a large canvas (about 2000 or 2600 pixels).

Step 9: Add details using a small brush. Here, pay attention to how I draw the details of the roof.

Click on the image to view the image in full size and 100% quality.
Step 10 A: In the next steps, I'm going to create a few more layers for the green grass. The reason for creating multiple layers is that you will need to adjust the drawing later. It is much easier to correct mistakes if the main elements of your drawing are separate objects. I rough-painted the drawing with a large hard round brush, and then added details with the same brush, but with a smaller diameter. I also created a new layer for the hair and made a rough sketch. Returning to the question of how to draw grass. Just click on the brush icon, choose a different color and paint as shown in my sketches. Then just repeat the same action.

Step 11: Now it's time to start detailing the clouds. When drawing the clouds, I shaped them with white on separate layers, and then changed the layer's blending mode to Overlay (Overlay) so that this effect was noticeable in the picture. And I only used two layers for the clouds. One color - as a base, and the other - to increase the brightness of the background. Try to find balance by combining different forms brushes, and try to draw clouds using different strokes. You also need to define lights and shadows. Photos of the real sky will help you in this matter. Just search Google for different cloud shapes.

Step 12: I also wanted to add some color sunlight and other details, such as, for example, a flash of lightning. After several attempts, I settled on the option that is shown in my drawing. At this point, it looked pretty close, but I'll get to that later. I should also note that each element of the drawing ended up on a separate layer, which allowed me to quickly select the desired object and change colors with ease. Press Command + Click (on Mac) or Control + Click (on Windows) on the layer icon in the "Layers" palette in order to select opacity (opacity).

Step 13: Settings. It is very important. You can pick desired color and thereby change the whole atmosphere. Now I'm using Color Balance. After that I changed the brightness and contrast. You will notice how the light effect changes.

conclusions:
Now it's time to close Photoshop. I hope you liked it! As a finishing touch, I add a Smart Sharpen filter to the flat drawing in order to get sharper, sharp lines. This helps bring out fine details such as highlights. I hope you enjoyed reading this tutorial.

Click on the image to view the image in full size and 100% quality.
This lesson will help you learn how to draw a 2D illustration using standard Photoshop brushes. We will go through all the stages of creating an illustration, from sketch to background, gradually working through, drawing all the details. All of these techniques can be successfully applied to other illustrations, as well as in the design of other types of projects, such as logos, for example - drawing and painting skills always come in handy. This illustration was created using Photoshop CS3 and Wacom Graphire 3.
1. Sketch
I started with a sketch. Having decided on the forms, I paid attention color scheme, highlighting the main and background colors. To do this, try to imagine the picture as accurately as possible. On Blank sheet Photoshop I sketched color spots. I don't like to work on a flat canvas - color transitions help set the mood for the job. I added a general background fill. You see, a lot of green grass came out - the good old song comes to mind about “... we dream of grass, grass near the house ...” Try to imagine yourself in such a place: that oak tree that you often climbed as a child grows near the house ...

2. Adjusting the brushes
Details will be added with a brush. In this illustration, I'm using only standard Photoshop brushes. If you want, you can download others and work with them. Let's set them up to work. Here are the brushes I will be using:

3. Color choice
Let's define the main colors with which we will work. Here is my palette for this illustration. As usual, I want to draw something brighter. For the background, I chose shades of yellow and blue. The rest of the colors are for the landscape. Save your palette as a separate file. And while you draw, keep it open at hand.

4. Working on objects
I decided to remove the old car that first stood near the house. She doesn't look that good there. The car is an optional object in this illustration. So, I erased the car, and drew my oak - and you, maybe draw another tree. To do this, I applied the main spots of paint with a hard round brush, and then schematically traced the details with the same brush, but smaller. You also need to create a separate layer for the grass and draw it in general terms too. 
5. Meadow
We continue to draw the grass in more detail, using both a small hard brush and smoothing the transitions with a soft one. Subsequently, I can change the grass, add flowers - red, blue or yellow. I'm not thinking about it yet, but the green grass will definitely come in handy in this illustration. 
6. Working with the palette
When choosing a color, I usually do this: 
7. Wood
See how I draw wooden fence boards. In this lesson I do not draw different types wood, there are only 2 types - for the door and for the fence. 
8. Canvas size
For high-quality drawing of details, you need a large canvas. If you see that the size you have chosen is clearly not enough, at this stage you can still increase it. For our work, we need a canvas of at least 2000 or 2600 pixels. 
9. Drawing with a small brush
We draw the details with a small brush. Take a look at how I work with roof detailing: 
10 Grass
Now I will create a couple more new layers of grass. I again fill the areas with the main color, and then work out the shadows with its shades. I also draw bunches of blades of grass in separate layers. Why draw grass in different layers? To make it easier to make changes that you later have to make. It is much easier to correct mistakes if the main elements of the work are in separate layers. In addition, somewhere you can save time and effort by duplicating successful layers with blades of grass in different places work.
You ask how to draw grass? Yes, just take a brush, pick up color - and draw a blade of grass. Then change the color - and draw the next one, just like in my example. And so many times. 
11. Clouds
It's time to start detailing the clouds. In order to draw the cloud, I outlined its shape on a separate layer and then set the layer to overlay to achieve the effect you see in this picture.
My sky consists of two layers: in one - the main colors, and in the other - all the bright places and gaps. Try to achieve harmony by changing the shape of the brush and painting the clouds with different strokes.
We need to set shadows and light. When in doubt, look at cloud shots. Check Google to check different types and cloud shapes. 
12. Clouds
I also want to add bright sun rays and gaps in the clouds, reminiscent of lightning. After going through several options, I settled on the following. While the highlights are still quite rough, but I'll finish with them later. I note that each of the elements is on a separate layer, which allowed me to quickly select them and easily make all the manipulations with shades, brightness, etc. : Ctrl + click on the desired object selects the corresponding layer, and Ctrl + click on the preview of this layer in the layers panel gives us a selection in the form of a layer object. 
13. Adjustments
That's what really matters. By choosing the appropriate shade, you can change the whole atmosphere of the illustration. now I'm changing the colors in Color Balance. Then I'll adjust the brightness and contrast. As you can see, the result is obvious. 
13. Summing up
Merge all layers into one. You can add the finishing touch by applying the Smart Sharpen filter to the resulting image to sharpen details. It helps a lot in showing small parts like glare.
It's time to close Photoshop Hope you enjoyed it! 
This lesson has been translated for you by Hatice Bayramoglu. We will be glad if you dare to show off the results)) Success in your studies!
Comments
- DeVeL
December 9, 2011 at 18:20Somehow not quite a lesson. Rather, just making of, and not the most detailed.
- Islam
December 17, 2011 at 06:53 pmBut I think you can still call it a lesson, just follow the logic and everything will be ok.))
- Vladislav
March 25, 2015 at 04:53 pmI am a project manager at the Children and Parents Against Cancer Charitable Foundation. www.deti-lipetska.ru
Our foundation is starting to publish a newspaper where I want to publish my fairy tale. Here is a link to the first three chapters:
lipetskblog.ru/blogs/blog...ste-glava-tretya
The tale is unusual because it is written for children who have fallen under the heavy millstones of a serious and painful illness. Therefore, the tale is a little sad but with a powerful life motivation.
Need illustrations! But since our fund is charitable and the newspaper is free, I ask you to show complicity and offer your own versions of illustrations for free. We, in turn, will definitely indicate this in each printed chapter of the tale. Thank you!..
Send us an email [email protected]
Katya Answer:
November 5, 2018 at 5:52 pmI can try) =)
Leave a reply
:o");" src="http://www..gif" alt=">:o" title=">:o">");" src="http://www..gif" alt="]:->" title="]:->">!}
Hello! My name is Hatice Bayramoglu, I am a 3D artist and illustrator from Turkey. In this tutorial I'll show you how to draw and color a character - an illustration for a children's book. As the lesson progresses, I will explain my choice of certain tools and my thoughts on the illustration. My tutorial shows how I create an illustration from an initial sketch to a full-fledged drawing. I believe that after reading this lesson you will find something useful for yourself. I will be using Photoshop and a Wacom tablet to create the artwork.
This drawing will be entirely created in Photoshop CS2.
Step 1: Sketch
Start by creating a new document in Photoshop. Its dimensions should be around 800x778 pixels. I started by making a quick sketch that reflects my main idea. Here is the basic outline environment around the main character.

So, as you can see, this sketch shows the main character - a little girl, standing next to With apple tree with an apple in hand. She smiles because she is happy, and perhaps a little sad.
Step 2: Adjusting the Brushes in Photoshop
Here is the one and only brush I use to color my character. For painting, I will use standard brushes.

Before you start painting, you need to set up the brush. Start by choosing a tool Brush(Brush), then use the standard brush, which is presented below.

(click on image to enlarge)
Step 3: Color palette
You must decide on the colors you will use before you start painting. Here are my colors used in the work:

Step 4: Layers (layers)
Create New layer(New Layer) and name it Sketch (Sketch). You can create this sketch in Photoshop or on paper. Once you've created your sketch layer, edit it Blend Mode(Blending Mode) to Multiplication(Multiply) and always keep it on top of all layers so you can see what you're painting over.
Now look at my layers palette. Here are separate layers for each sketch object. Coloring each detail on a new layer makes it easy to make adjustments as you draw. It's much easier to correct mistakes if the main elements of your illustration are on separate layers. This step is really important!

Step 5: Work on the background color
Here let me show you how I paint the background. Choosing a tool fill(Paint Bucket) (G). After you fill the background, it should look like this. Make sure the layers are arranged as shown in the image below.


Step 6: Coloring the Basic Shapes
Before I start coloring, let me show you the order of the layers again. I changed it because the sketch layer should be above all layers and also set to Multiplication(Multiply). At this point, we can start coloring the sketch and we can define the main shapes. Using the tool Brush(Brush) (B), start painting the main character and the tree on separate layers. Make sure that Rigidity(Hardness) of the brush is set to 100%. A brush with soft edges can result in a slightly blurry result.

And in this step, I would like to change the size of my file, because I want to add finer details. So I open Image(image)- Image size(Image Size) and increase the file size to 1500x1495.

Step 7: Adding Details
Now I can start adding details. In this step, I started by painting the face. main character. Make sure you are working on the correct layer before painting.

And here I made a copy of the tree layer and added some details to it. I also hid the first tree layer.

Here's a screenshot for details. I started adding even more details to my drawing, such as grass and little flowers. At this stage, I created a layer called Flowers (Flowers).

I add even more colors and fine detailed lines to the wood.

Now look at the details I just created. I continue to add details and, if necessary, create new layers.

Step 8: Special attention to the main character
Now, since I'm happy with the detailing of the scenery and wood, I'll add details to the girl's clothes. At this stage, I noticed that my character looks very simple and not very attractive, so I thought I should take the time to make some changes. I tried to give a slightly different look to the heroine and continued to add more details. Pay attention to the order of the layers again. As you can see, in this step I have a few more new layers. All layers have their own names.

Now I start adding small details to the heroine by adding more yellows and greens. By the way, do not forget that in this step you do not have to detail everything. At this stage, I work on the main details and lighting until I get a nice contrast. Sometimes I change some colors. I have almost finished painting her clothes and body. I also moved the sketch layer to one side a little so that you can see what the heroine looks like without a base with a sketch.

Step 9: Adding Highlights and Contrast
I used the tool clarifier(Dodge) (O) to lighten areas. This is what the work looks like after all the adjustments made by the tools clarifier(Dodge) (O) and Dimmer(Burn). I continue to add even more details on the tree using brushes of various sizes and colors. Once enough details were added, I began to smooth them out using a soft-edged brush. I also use tools clarifier(Dodge) (O) and Dimmer(Burn) to give shadows to the branches.


I also add a few strokes with the tool Finger(Smudge). I use it because I want to add soft blurry areas to the clouds and background. At this stage, I noticed that my clouds are not very detailed. So I created a new layer to paint the details to the cloud using two tools: Finger(Smudge) and Brush(Brush).

Step 10: Adding More Details
At this stage, I noticed that I need to add more flowers to my drawing. So I create a new layer and, as you can see, draw some nice and simple flowers. I keep adding more details. I add some strokes with the tool clarifier(Dodge) (O) I'm doing this because I want to add some lightly lit patches of grass.

Now that I've completed the grass and background, I can start adding more detail to the girl's hair and face. Select brush mode Lightening Basics(Color Dodge) and add some strokes to her face.

Now pay attention to the details that I added using only the brush in mode Lightening Basics(Color Dodge).

Step 11: Color Correction
The work on the drawing is almost finished except for the color correction. To start Drain(Merge) all layers. Now in Image(image)- Corrections(Adjustments)- Brightness/Contrast(Brightness/Contrast) Change the color a bit. I want to give the illustration a more sunny effect.

Set the options I have set. This is what the illustration looks like - more sunny and joyful.

Finished illustration
And here is the finished illustration, I hope you found this lesson interesting. Thanks for reading.


